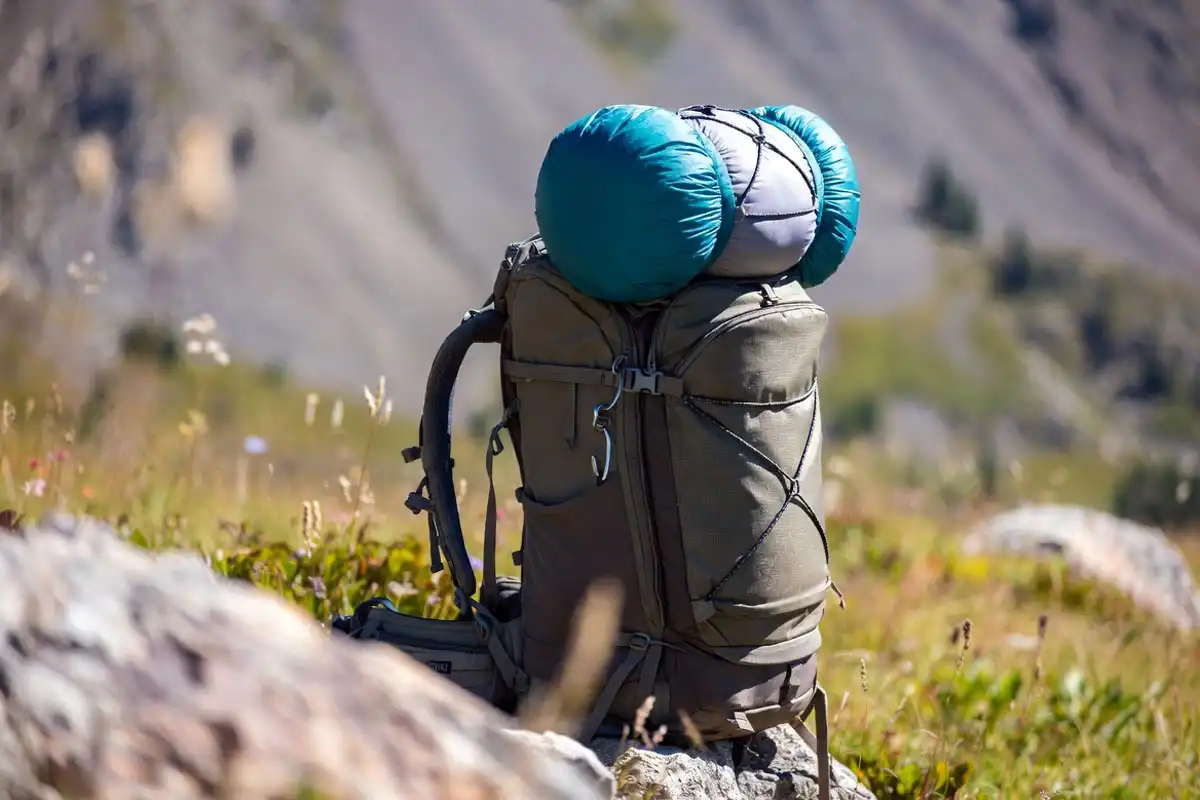
How to Attach a Sleeping Bag to a Backpack in Under 3 Minutes
You can attach a sleeping bag to a backpack using bottom straps, compression straps, bungee cords, or carabiners clipped to the pack’s gear loops. This guide covers five attachment methods, positioning tips, waterproofing steps, and common mistakes so your sleeping bag stays secure on every trail.
Compress your sleeping bag into a stuff sack or dry bag first. Then secure it to the bottom of your backpack using the built-in straps or tie points. Thread the straps through the loops on your stuff sack, tighten until snug, and check that the bag sits centered. If your pack lacks bottom straps, use bungee cords or carabiners clipped to daisy chains or gear loops.
Why Attach a Sleeping Bag to the Outside of a Backpack?
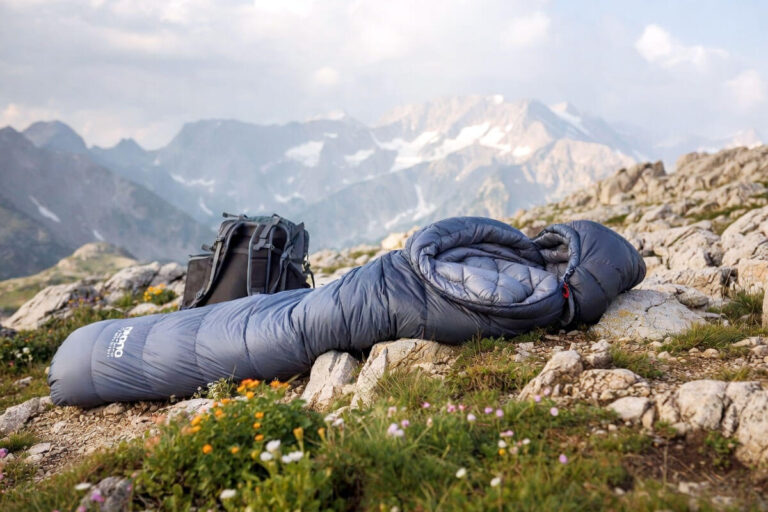
Most backpackers attach a sleeping bag externally when the main compartment runs out of space. A compressed sleeping bag takes up 8 to 15 liters depending on insulation type and temperature rating. On multi-day trips, food, clothing, and shelter gear fill the pack first.
External attachment frees interior space for items that need quick access or weather protection. It also helps with organizing gear into zones, so you know where everything sits without digging through layers.
If your pack has a bottom compartment for balanced weight, store the bag inside. Go external only when interior space runs out. An exposed sleeping bag needs waterproofing, which I cover below.
What You Need Before Attaching a Sleeping Bag
Preparation takes 2 to 3 minutes and prevents problems on the trail. Here is what to gather before you start.
- Compression sack or dry bag. A compression sack reduces sleeping bag volume by 30 to 50 percent. A waterproof dry bag adds rain protection. Either option creates a compact, strap-friendly shape.
- Stuff sack with loops. Many sleeping bag stuff sacks include webbing loops on the outside. These loops connect directly to backpack straps or carabiners. Check your sack before heading out.
- Bungee cords or paracord. Useful when your backpack lacks dedicated attachment points. A single 36-inch bungee cord with hooks on each end works for most setups.
- Carabiners. Two small, non-locking carabiners clip a stuff sack to gear loops or daisy chains in seconds. They weigh around 15 to 25 grams each.
If you carry a lightweight backpacking sleeping bag, the compressed size is smaller and attaching it externally becomes easier.
How to Attach a Sleeping Bag to a Backpack (Step-by-Step)
Method 1: Bottom Straps or Tie Points
This is the most stable method. Most hiking backpacks include two parallel straps at the base.
- Compress your sleeping bag into its stuff sack. Squeeze out trapped air.
- Loosen the bottom straps fully.
- Place the bag horizontally against the pack bottom. Center it evenly.
- Thread each strap through the stuff sack loops. No loops? Wrap straps around the bag.
- Tighten the buckles until the bag sits snug. It should not swing when you walk.
- Take a few steps with the loaded pack. Adjust if the bag bounces or pulls to one side.
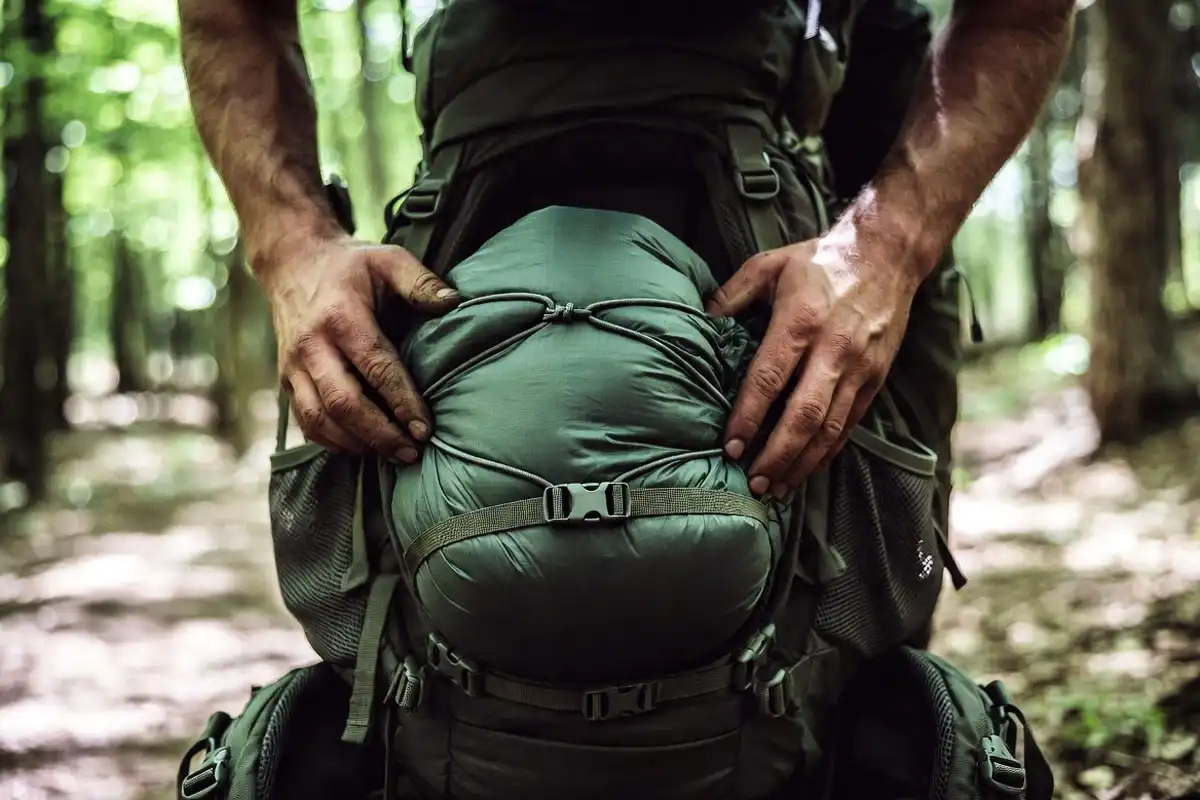
Method 2: Backpack Lid
The top lid folds over the main compartment and clamps gear underneath.
- Pack and zip your backpack closed.
- Place the compressed sleeping bag on top, centered between shoulder straps.
- Pull the lid over the bag and buckle the straps tight.
This keeps weight high and centered. Harvard’s Outdoor Program recommends keeping about three-quarters of pack weight on the hips, and a centered top load supports that balance.
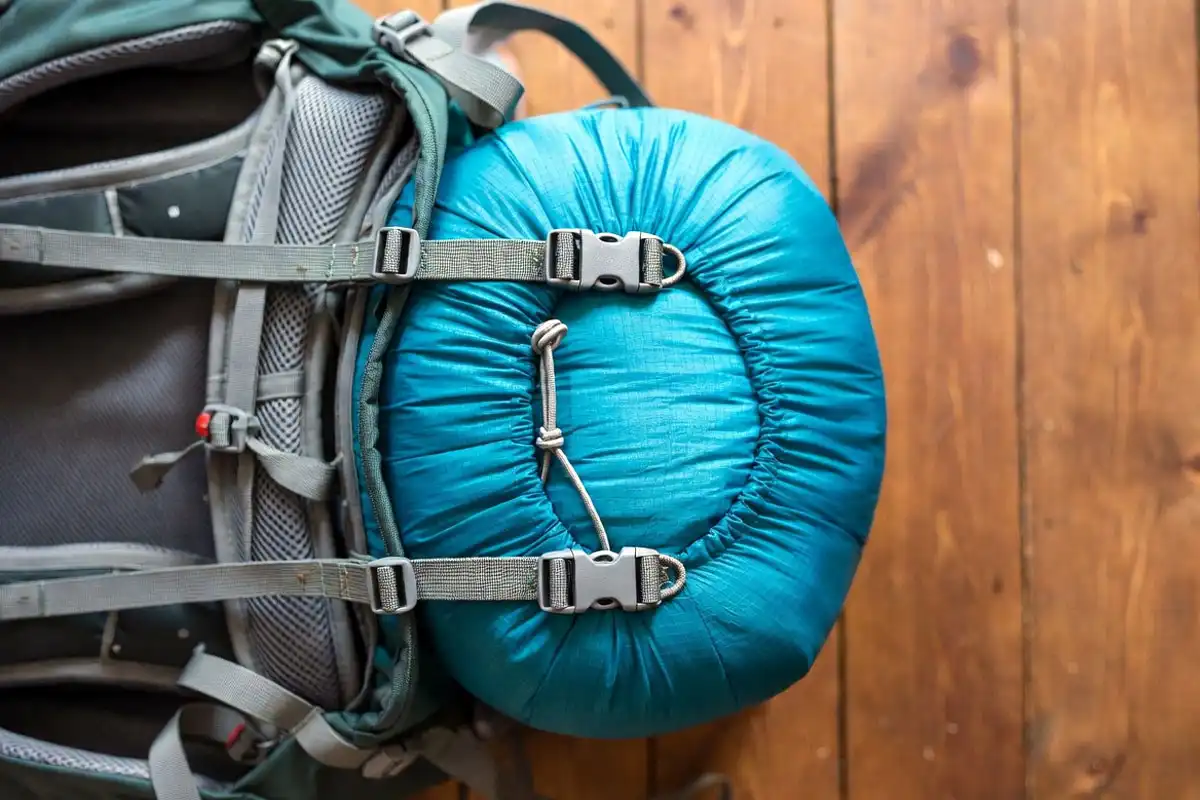
Method 3: Compression Straps
Side compression straps cinch down the main load. They also hold external gear.
- Loosen the side compression straps on one side.
- Slide the compressed sleeping bag between the straps and pack body.
- Tighten until firm.
Side attachment shifts weight unevenly. Balance the opposite side if you use this method. I covered how uneven loads affect comfort in a piece on packing a backpack to prevent shoulder pain.
Method 4: Bungee Cords or Paracord
Works when your pack has no dedicated sleeping bag straps.
- Hook one end of the bungee cord to a daisy chain or strap buckle on one side.
- Stretch the cord across the sleeping bag at the bottom of the pack.
- Hook the other end to a matching point on the opposite side.
- Wrap once more for extra security.
Check hooks periodically during your hike. Elastic cords loosen over time in heat.
Method 5: Carabiners and Gear Loops
Fast and simple for lighter bags.
- Clip a carabiner through a webbing loop on your stuff sack.
- Attach it to a gear loop or daisy chain on your pack.
- Use a second carabiner on the opposite side to prevent swinging.
Two points stop the bag from bouncing. This method works best for lightweight sleeping bags.
Where to Position a Sleeping Bag on a Backpack
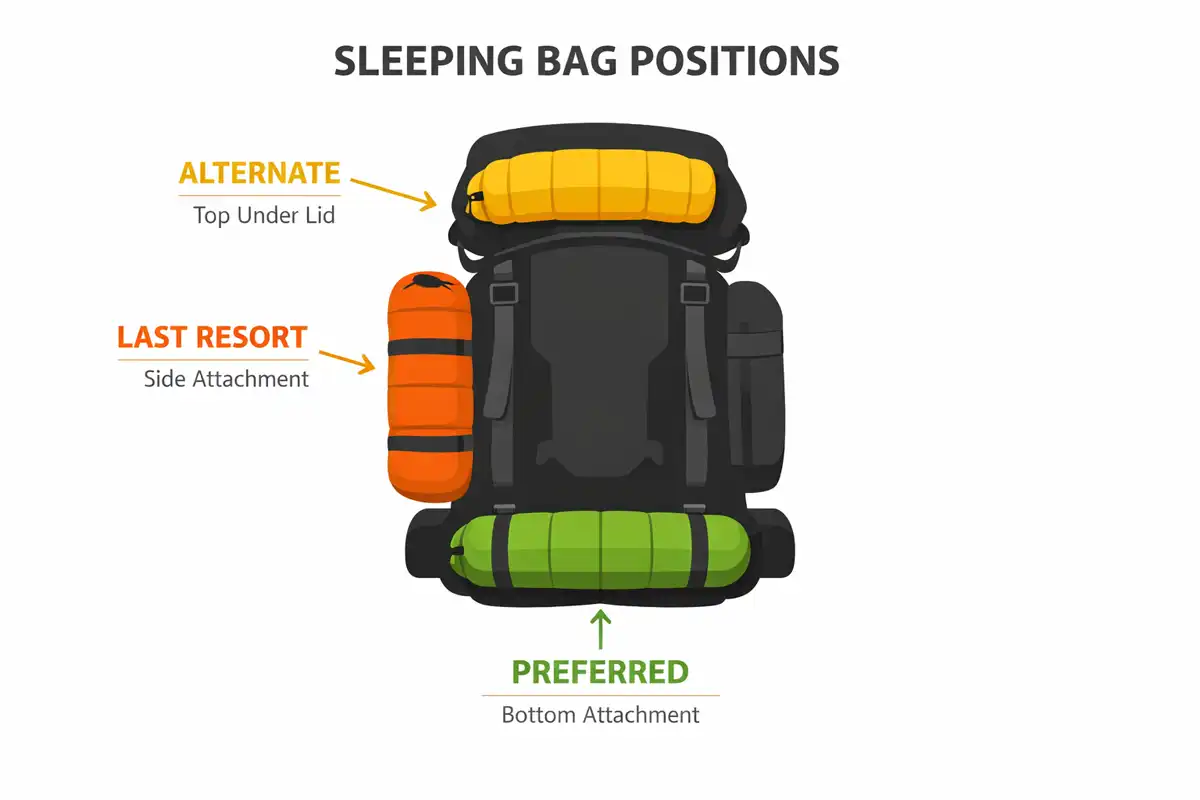
Bottom of the pack is preferred. Sleeping bags are bulky but light. Low placement keeps the center of gravity near your hips and improves balance. Research from the National Library of Medicine confirms that load position directly affects posture and muscle strain.
Top (under the lid) works for shorter trips when bottom straps hold a sleeping pad.
Side of the pack is a last resort. It creates uneven load on narrow trails. Avoid dangling the bag below the pack bottom, where it catches brush and adds sway.
How to Keep a Sleeping Bag Dry When Attached Externally
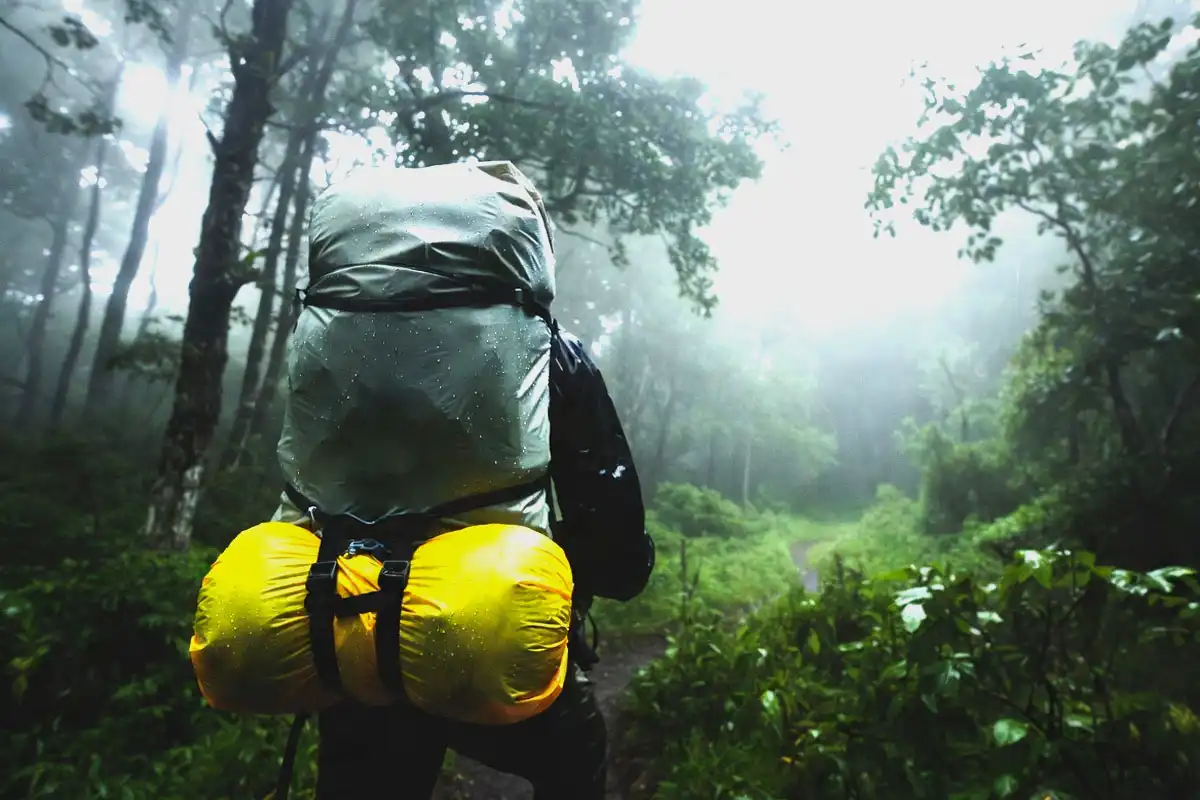
Wet insulation loses warmth fast. Four options help:
- Use a waterproof compression sack. This is the single best investment for external carry. A quality dry compression sack costs between $15 and $30 and seals out moisture completely.
- Add a pack rain cover. A rain cover fits over the entire backpack and any externally attached gear. Most covers weigh between 80 and 150 grams.
- Line the stuff sack with a trash compactor bag. A 2-mil compactor bag adds a second waterproof layer inside a non-waterproof stuff sack. This is a budget-friendly backup.
- Avoid cotton stuff sacks. Cotton absorbs water and dries slowly. Nylon or sil-nylon sacks repel moisture and dry faster in the field.
I covered more on insulation care in my article about washing a sleeping bag without damaging the fill.
Common Mistakes When Attaching a Sleeping Bag to a Backpack
- Skipping compression. A loose bag catches wind and snags branches.
- Using one attachment point. A single strap lets the bag swing freely. Use at least two.
- Ignoring weight balance. One-sided gear causes fatigue over distance. Your hips and spine compensate for the uneven load.
- Overtightening down bags. Extreme compression damages down clusters long-term. Tighten enough to hold steady, not crush flat.
- Not checking mid-hike. Straps loosen from movement. Stop every hour on rough terrain to check. For lighter setups on solo trips, I shared tips on reducing pack weight for backpacking.
FAQs about Secure Sleeping Bag to Backpack
Can I attach a sleeping bag to any backpack?
Most hiking and travel backpacks have straps, daisy chains, or gear loops that accept a sleeping bag. Daypacks without external attachment points still work with bungee cords or paracord threaded through the frame or carry handle.
Where is the best place to attach a sleeping bag on a backpack?
The bottom of the backpack provides the most stable position. It keeps the center of gravity low and close to your hips, which improves balance on uneven terrain and reduces shoulder strain during long hikes.
Should I roll or stuff my sleeping bag before attaching it?
Stuffing is faster and fills the compression sack more evenly than rolling. Stuffing also prevents repeated creasing along the same fold lines, which preserves insulation loft over months of regular use on the trail.
How do I stop my sleeping bag from swinging while hiking?
Use two attachment points on opposite sides of the stuff sack. Tighten straps until the bag sits flush against the pack body. Check strap tension every hour, especially on rocky or uneven trails where movement loosens buckles.
Is it safe to carry a sleeping bag on the outside in rain?
External carry in rain works if you use a waterproof dry bag or compression sack. Add a pack rain cover for full protection. Without waterproofing, rain soaks insulation within minutes and reduces warmth significantly at camp.
Final Words about Strap Sleeping Bag to Backpack
I have attached sleeping bags to backpacks using every method listed here, from bottom straps on mountain trails to bungee cords on quick overnight trips. The approach that works best depends on your pack design and trip length.
Compress the bag tight, use two attachment points, and always waterproof it before heading out. Spend 2 minutes securing your gear at the trailhead. That small effort saves you from chasing a loose sleeping bag down a slope later. Good luck and enjoy outdoors.