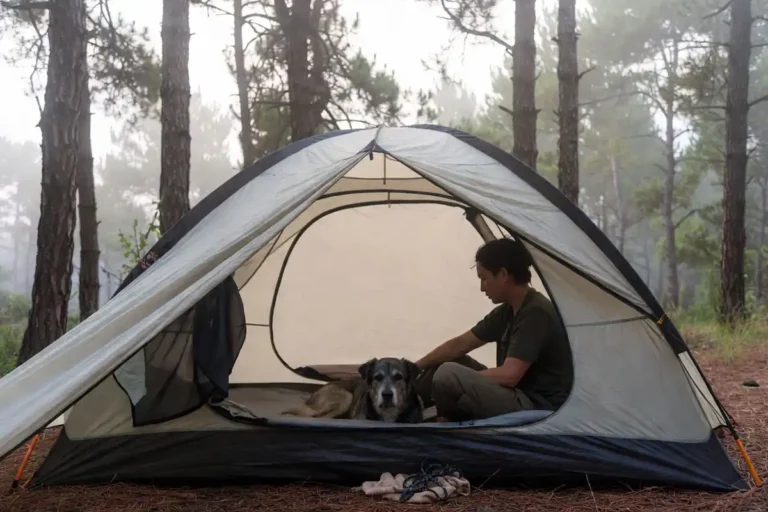
How to Pack a Camping Backpack to Distribute Weight Evenly
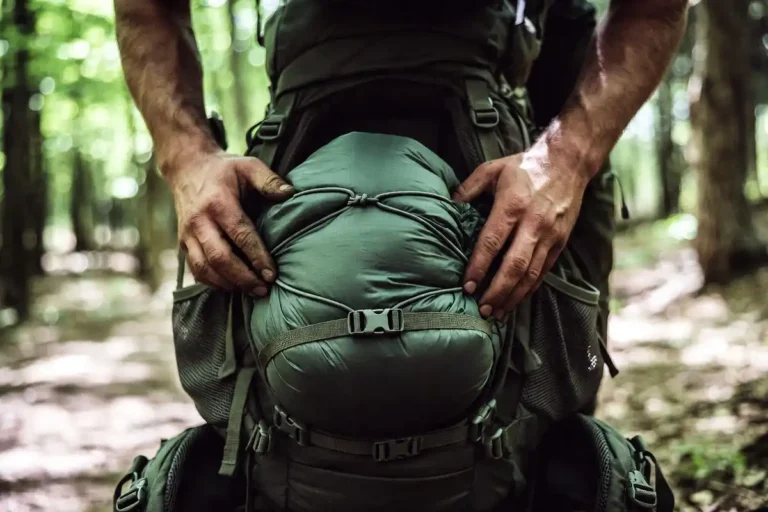
To pack a camping backpack and distribute weight evenly, place your heaviest gear flat against your spine and centered at mid-back, which keeps your center of gravity stable and reduces lower back strain across a full day on the trail. This guide covers the three loading zones, the correct packing order from bottom to top, strap adjustments, and the packing mistakes that cause shoulder and hip pain on long hikes.
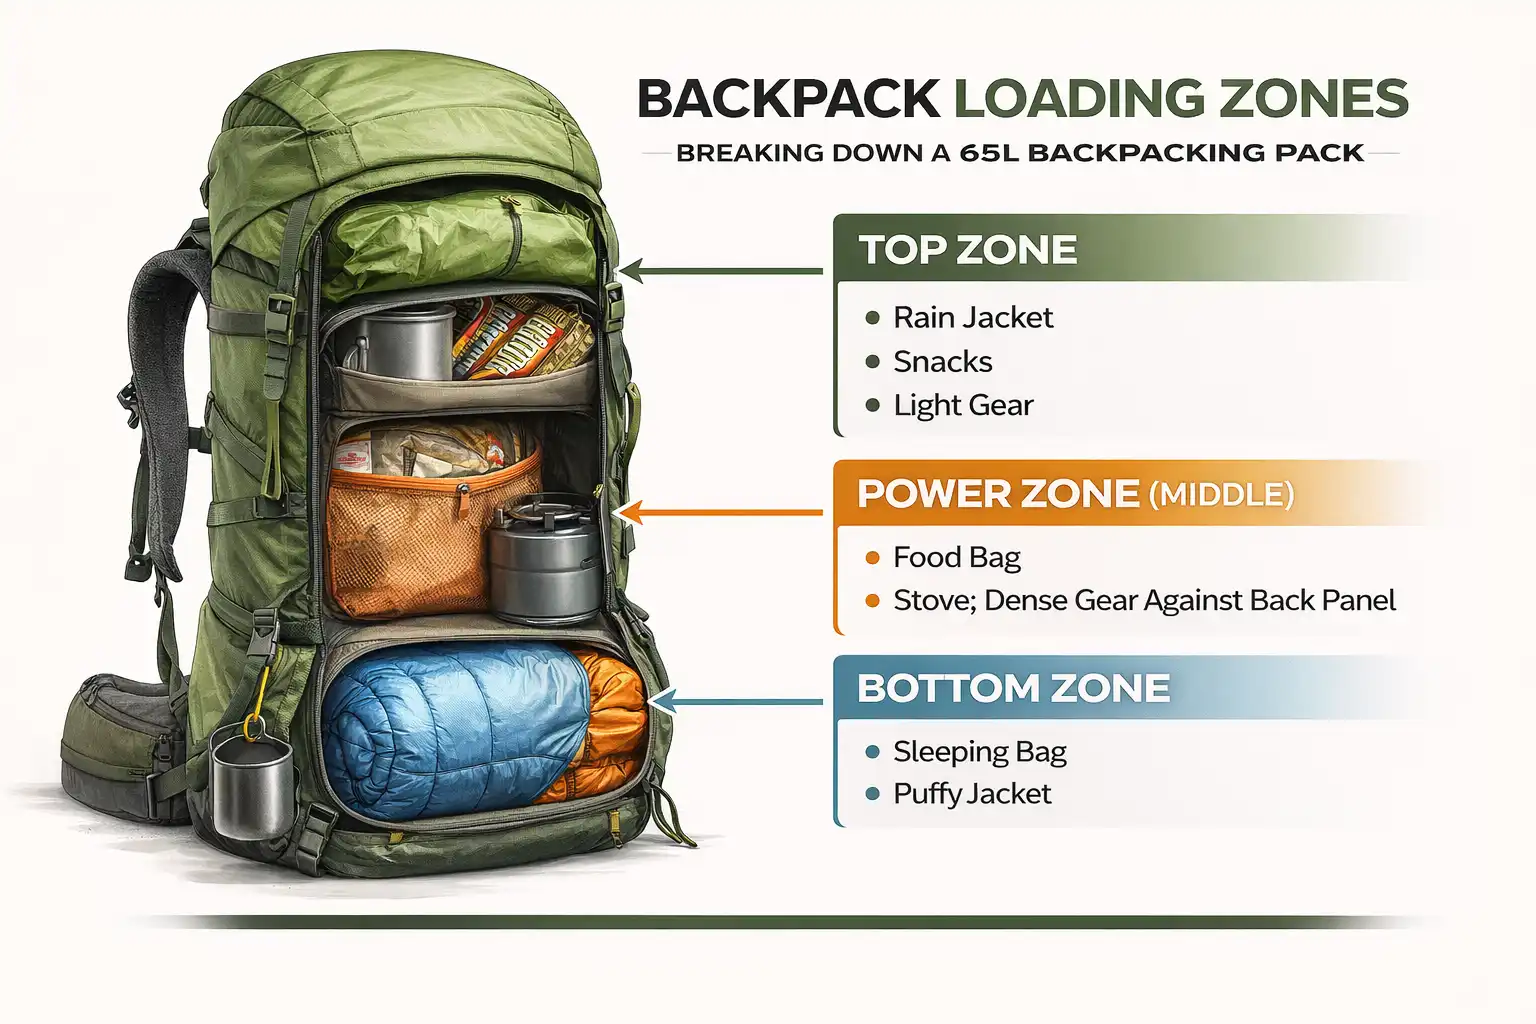
Place heavy items (food bag, water reservoir, stove, fuel) flat against your back panel in the middle zone. Pack light compressible gear (sleeping bag, puffy jacket) at the bottom. Fill the outer middle section with medium-density items. Keep frequently used gear in the top lid and hip belt pockets. Fit the hip belt first, then shoulder straps, then load lifters. This loading pattern transfers most pack weight to your hips and keeps your balance forward.
What Is Weight Distribution in a Backpack?
Weight distribution refers to where each piece of gear sits inside your pack relative to your spine, hips, and vertical center.
A correctly loaded pack keeps the heaviest mass close to your back and level with your shoulder blades. This shortens the load’s lever arm and reduces the rotational pull on your lumbar spine. A pack loaded at random transfers that pull to your shoulders and neck instead of your hip belt.
Why Distributing Weight Evenly Matters
A well-packed backpack places most of its weight on your hip belt, not your shoulder straps. Your hips and legs handle load far better than your shoulders over a long trail.
Poor weight distribution pulls your torso backward. Your back muscles then compensate continuously, which accelerates fatigue. On uneven terrain, a poorly balanced pack also affects your balance and increases your risk of a stumble or fall.
If you already plan to pace yourself carefully on a long hike, a properly packed bag makes that effort far more sustainable.
The Three Pack Zones
Most backpacks have three vertical zones. Understanding each zone before you pack saves you from repacking on the trail.
Bottom Zone This zone holds light, compressible items you rarely need mid-hike: sleeping bag, packable puffy jacket, and a sleeping pad (if it fits internally). These items compress easily and anchor heavier gear above them.
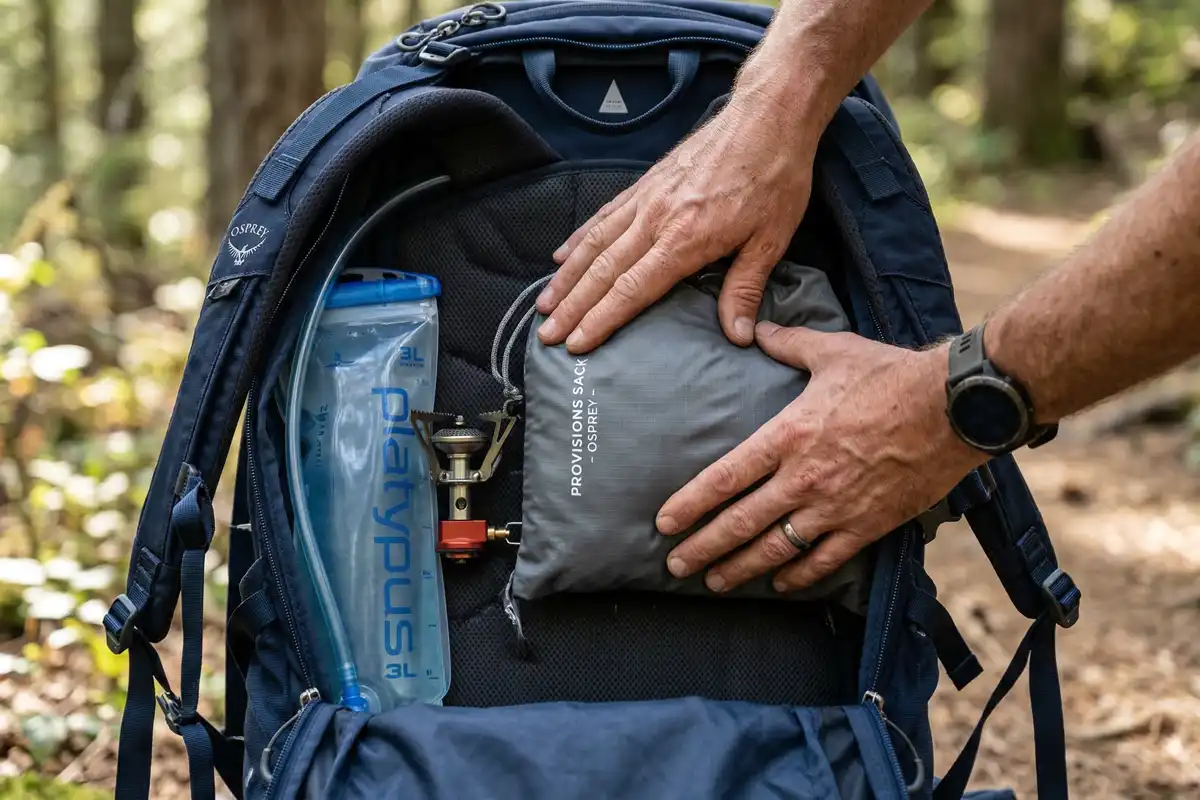
Middle Zone (Power Zone) The middle zone runs against your back panel between your shoulder blades and your lower back. This is where your heaviest, densest items belong: food bag, water reservoir or filter, camp stove, and fuel canister. Keeping dense items here presses them against your frame and spine, not away from it.
Top Zone The top zone holds gear you access several times a day: rain jacket, snacks, sunscreen, headlamp, and first aid kit. Pack this layer last so you reach it without digging.
Lid and Hip Belt Pockets The top lid pocket carries navigation tools, a phone, and light items. Hip belt pockets hold one or two snacks and a lip balm so you reach them without stopping.
Step-by-Step: How to Pack a Camping Backpack
Step 1: Sort All Gear Before You Pack
Lay everything out and sort it into three groups: heavy, medium, and light. Identify items you need to access during the day versus only at camp. This sorting step prevents you from burying essential items under dense gear.
If you use a camping checklist to prepare before a trip, this sort step fits naturally into the final check before you leave.
Step 2: Fill the Bottom Zone First
Compress your sleeping bag into its stuff sack and place it at the very base of the main compartment. Add a packable insulation layer on top. These light, compressible items fill the irregular space at the base and keep the heavier middle zone from sinking.
Step 3: Load Heavy Items Against Your Back Panel
Place your food bag, water bladder, stove, and fuel directly against the back panel in the middle zone. Keep each item as flat as possible. Avoid placing rigid or sharp items near the outer shell where they shift during movement.
Step 4: Fill the Outer Middle Section
Pack tent poles, a camp towel, a bear canister, or a packable shelter in the outer middle section. These medium-density items stabilize the pack’s shape without overloading the frame. Pack them firmly so nothing shifts.
Step 5: Add the Top Layer
Place your rain jacket at the top of the main compartment. Add snacks, sunscreen, and your first aid kit above that. Everything in this layer should be reachable with one hand in under five seconds.
Step 6: Secure External Attachments
Trekking poles, a wet tent, or an oversized sleeping pad attach to the outside. Lash each item tight and centered. Anything that swings to one side creates a lateral imbalance that strains your hip on long approaches.
Step 7: Put the Pack On and Adjust All Straps
This step determines whether the packing sequence actually works on your body.
- Loosen all straps before putting the pack on.
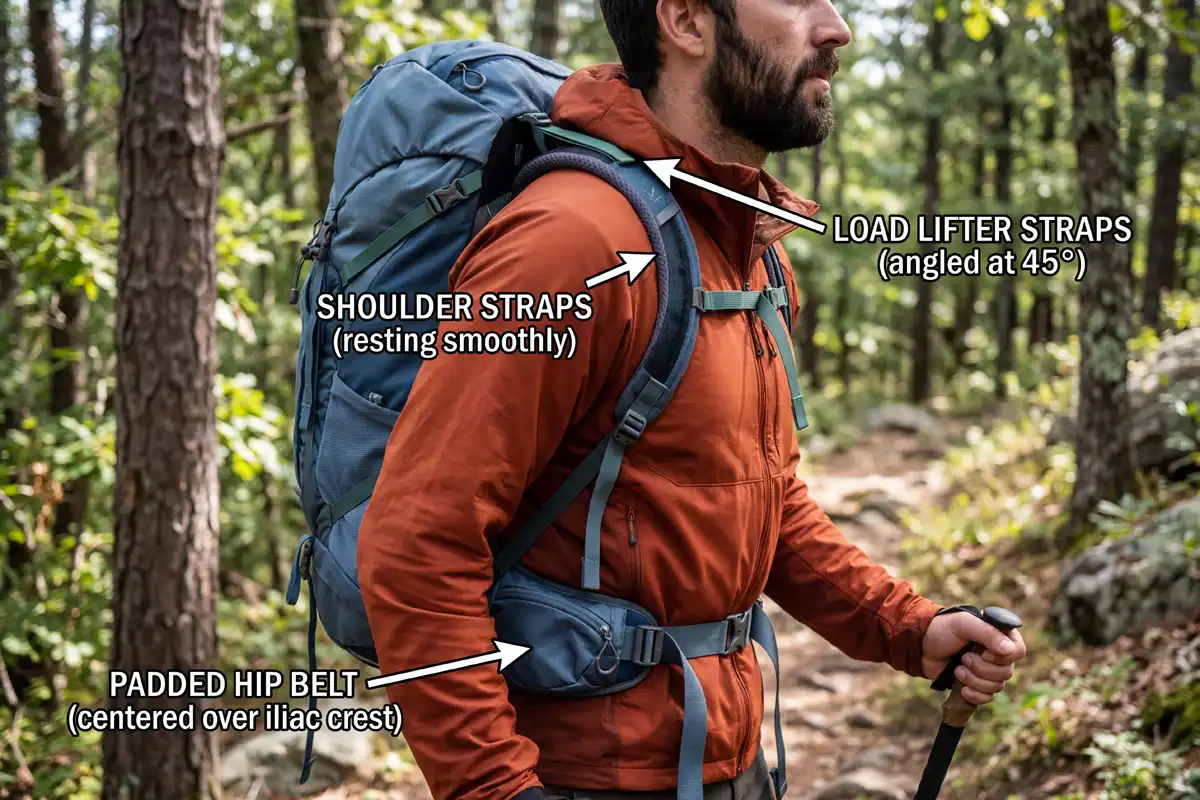
- Tighten the hip belt so the top edge of the padded section sits over your iliac crest, the bony shelf of your pelvis.
- Pull the shoulder straps snug so they rest against your shoulders without digging in.
- Pull the load lifter straps (the short diagonal straps from the top of the shoulder straps to the pack body) until they sit at approximately a 45-degree angle.
- Tighten the sternum strap lightly to stabilize the shoulder straps during movement.
How to Check If Your Pack Is Balanced
Walk 20 steps and notice where you feel the load. Your hips and pelvis should carry most of it.
If your shoulders ache within five minutes, loosen the shoulder straps slightly and tighten the hip belt. If the pack pulls backward, your heavy items sit too far from your spine. If the pack leans to one side, your left-right load is uneven.
Lean forward at the waist. The pack should follow your body movement without resistance. Resistance means the load center sits too high.
What to Do with Gear That Won’t Fit Against Your Back
Sometimes a large bear canister or rigid water filter pushes heavy items away from your spine.
In this case, center the item left-to-right and position it as close to mid-back height as possible. Never place a heavy canister at the very bottom or at the top. Either position shifts your center of gravity in a direction your hip belt cannot correct.
I covered this scenario in an earlier article on reducing tent and gear weight for solo backpacking, where lighter gear choices make proper zone loading much easier.
Common Packing Mistakes to Avoid
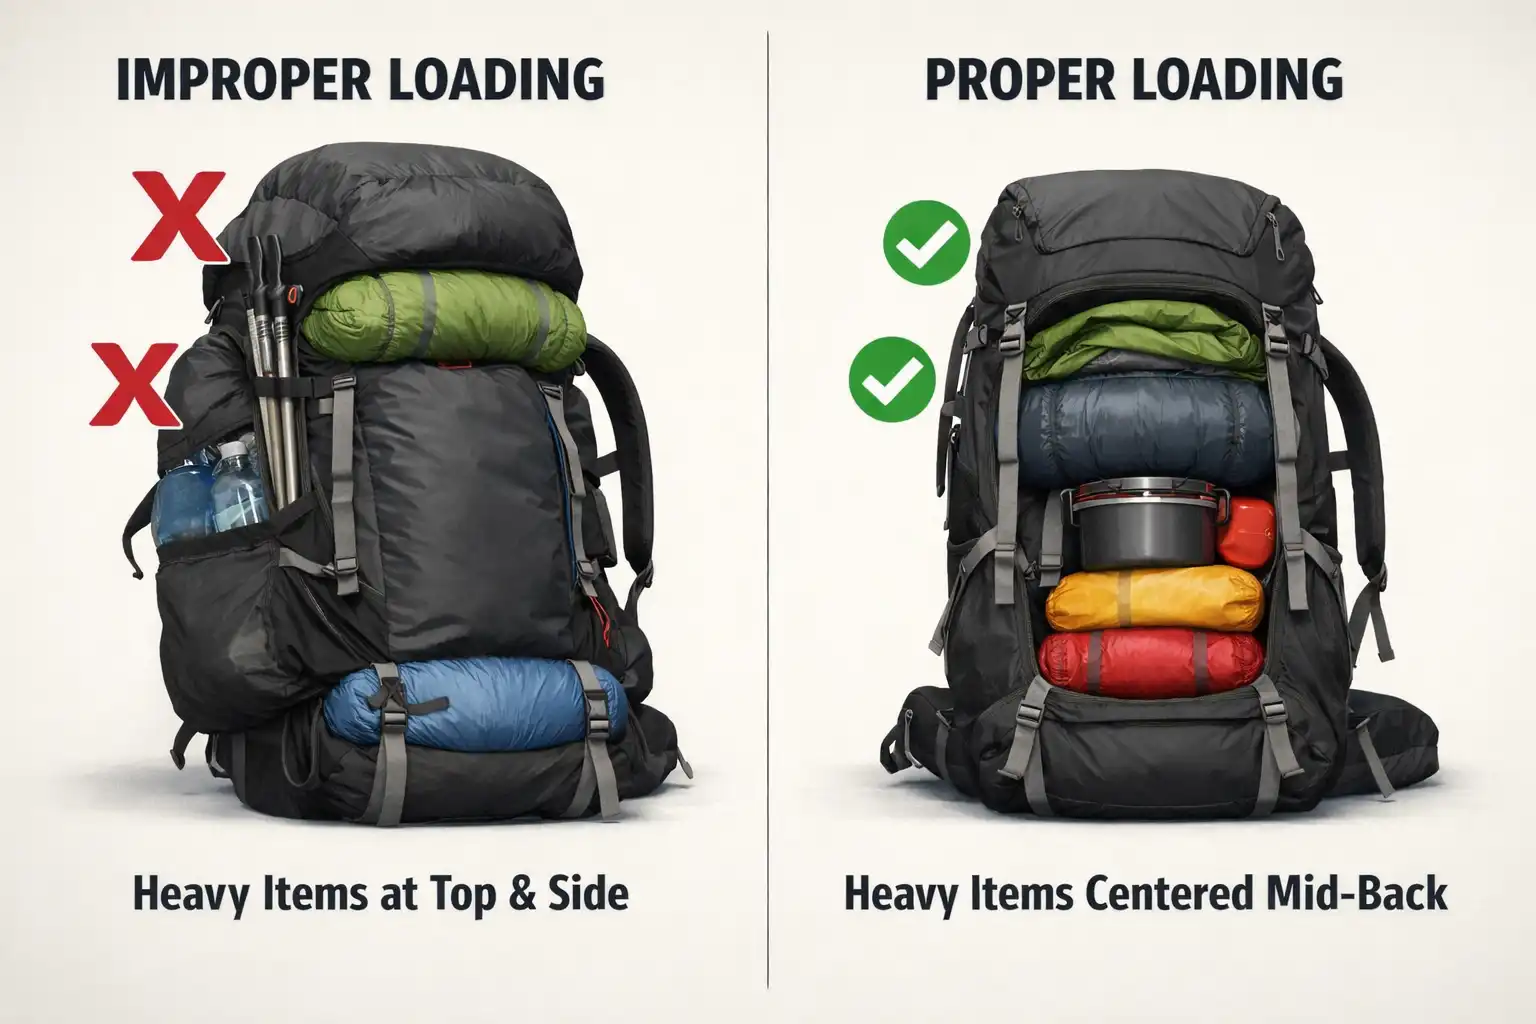
Placing heavy gear at the top. Heavy items at the top raise your center of gravity and destabilize you on steep terrain.
Packing sharp objects near your back panel. Tent stakes, a trowel, or a knife sheath cause discomfort and can damage the foam padding. Wrap them and place them in outer pockets.
Ignoring left-right symmetry. Overfilling one side pocket rotates your spine over several miles. Check that both sides carry roughly equal weight before you leave the trailhead.
Leaving the hip belt loose. A loose hip belt transfers all weight to your shoulders. Shoulder fatigue follows within an hour.
Pressing wet gear against dry insulation. A wet rain jacket or wet tent pressed against your sleeping bag dampens the insulation. Use a pack liner or dry bags for down layers and sleeping bag.
Safety Notes for a Loaded Pack
Keep your total pack weight under 20% of your body weight for day hikes and no more than 25-30% for multi-day trips. Higher loads increase joint stress and reduce your agility on technical terrain.
Check your load lifter straps before any steep descent. A pack that shifts on a downhill section affects your balance more than on flat ground. The same body mechanics I discussed in an article on hiking uphill without losing energy apply equally on the way down: a stable, centered load reduces the energy cost of each step.
Wear footwear that matches the terrain and your pack weight. Heavier loads increase the demand on ankle support, and breaking in boots before a loaded hike prevents blisters from developing before you reach camp.
FAQs about Pack a Camping Backpack to Distribute Weight Evenly
Where does the heaviest item go in a backpack?
The heaviest item goes flat against the back panel in the middle zone, level with your shoulder blades and upper back. This keeps the dense mass close to your spine, shortens the load’s lever arm, and transfers weight to your hip belt rather than your shoulders.
Why does my backpack hurt my shoulders even after adjusting?
The most common cause is heavy gear packed too far from your spine or too high in the pack. Tighten the hip belt fully so your pelvis carries the load. If the pain continues, remove the pack and repack with all heavy items flat against the back panel in the middle zone.
Should heavy items go higher or lower in a backpack?
Heavy items belong in the middle zone, level with your mid-to-upper back. Placing them too high raises your center of gravity and causes instability. Placing them too low shifts the load below your hip belt and forces your lower back to compensate.
Does the sleeping bag go at the top or bottom of a backpack?
The sleeping bag goes at the bottom of the main compartment. It compresses easily, fills the base space efficiently, and keeps all heavier gear above it centered against your back panel where it belongs.
How do I balance a backpack from side to side?
Distribute gear evenly across both sides of the main compartment and both side pockets. After loading, lift the pack by its top handle and observe whether it hangs straight. A lean to one side indicates uneven loading. Shift weight from the heavier side until the pack hangs level.
Last Notes
Packing a camping backpack correctly takes about 10 minutes and saves hours of discomfort on the trail.
Heavy gear belongs against your spine in the middle zone. Light gear fills the base. Frequently used items stay at the top. Adjust your hip belt first, then shoulder straps, then load lifters before you take your first step.
If something feels off after 15 minutes of walking, stop and repack. A stable, properly loaded pack feels like part of your body, not a weight dragging behind it.