How to Pack a Hiking Backpack So Your Shoulders Don’t Hurt
Shoulder pain from a hiking backpack comes from poor weight distribution, not the pack itself. This guide covers how to load, fit, and adjust a backpack correctly so the weight sits on your hips, not your shoulders. Follow these steps before your next trip and the difference will be immediate.
To pack a hiking backpack without shoulder pain, place heavy items close to your back and near your shoulder blades. Adjust the hip belt first so it sits on your iliac crest. Tighten shoulder straps snug but not hard. Use load lifters to pull the top of the pack toward your back. Your hips carry 80% of the load. Your shoulders stabilize it.
Why Does a Hiking Backpack Hurt Your Shoulders?

Shoulder pain happens when the pack weight sits on the shoulder straps instead of the hip belt. This usually comes from one of three problems: wrong torso fit, heavy gear packed too low, or shoulder straps adjusted too tight before the hip belt is set.
The shoulder straps stabilize the pack. They are not designed to carry the full load. When the hip belt sits below the iliac crest (the bony shelf of your pelvis), weight transfers upward into the straps. Shoulders fatigue fast under that pressure, especially on long hikes.
If your pack still tugs on your shoulders, fix the load balance first with my distribute pack weight evenly guide.
Step-by-Step: How to Pack a Hiking Backpack to Prevent Shoulder Pain
Step 1: Match the Pack to Your Torso Length
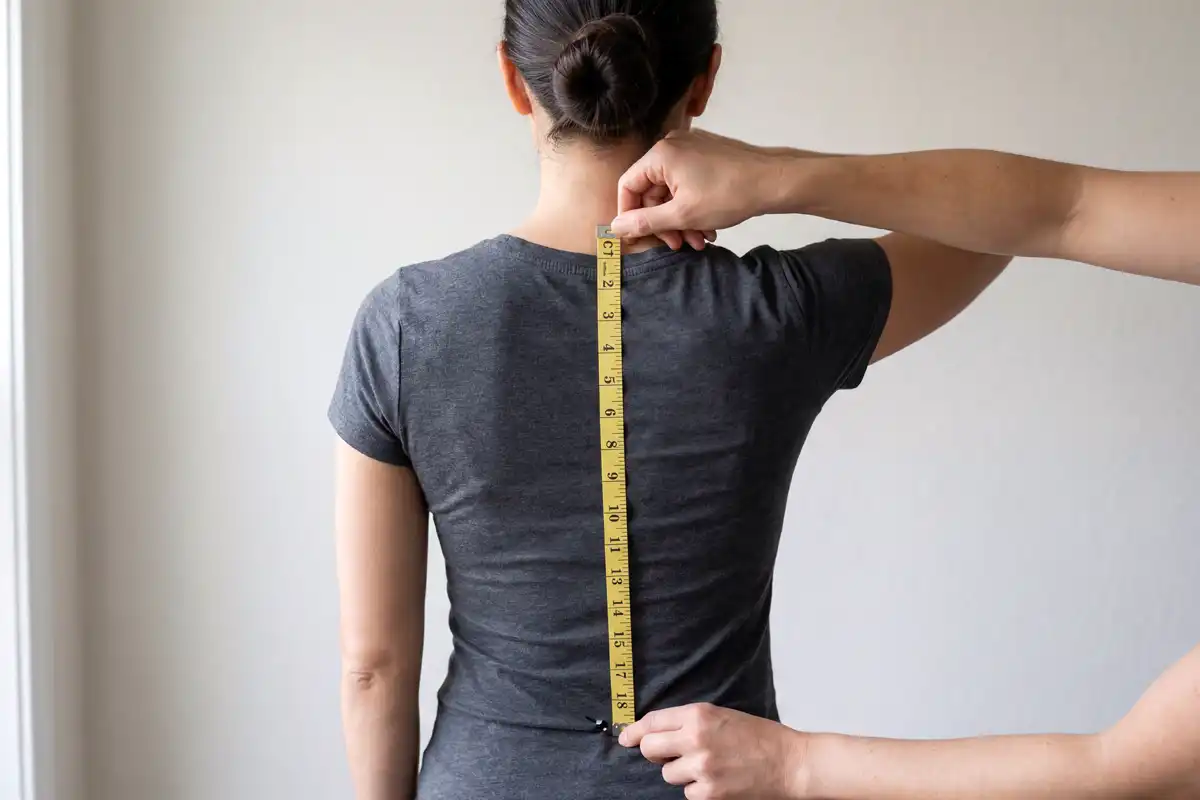
Torso length determines fit, not your height. Measure from the C7 vertebra (the bony bump at the base of your neck) down to the top of your iliac crest.
Most backpack brands size packs as XS, S, M, L based on this measurement. A pack that fits too long or too short will never carry weight comfortably, no matter how you load it.
If you want guidance on reducing total pack weight before loading, I covered that in detail in my earlier article on reducing tent weight for solo backpacking.
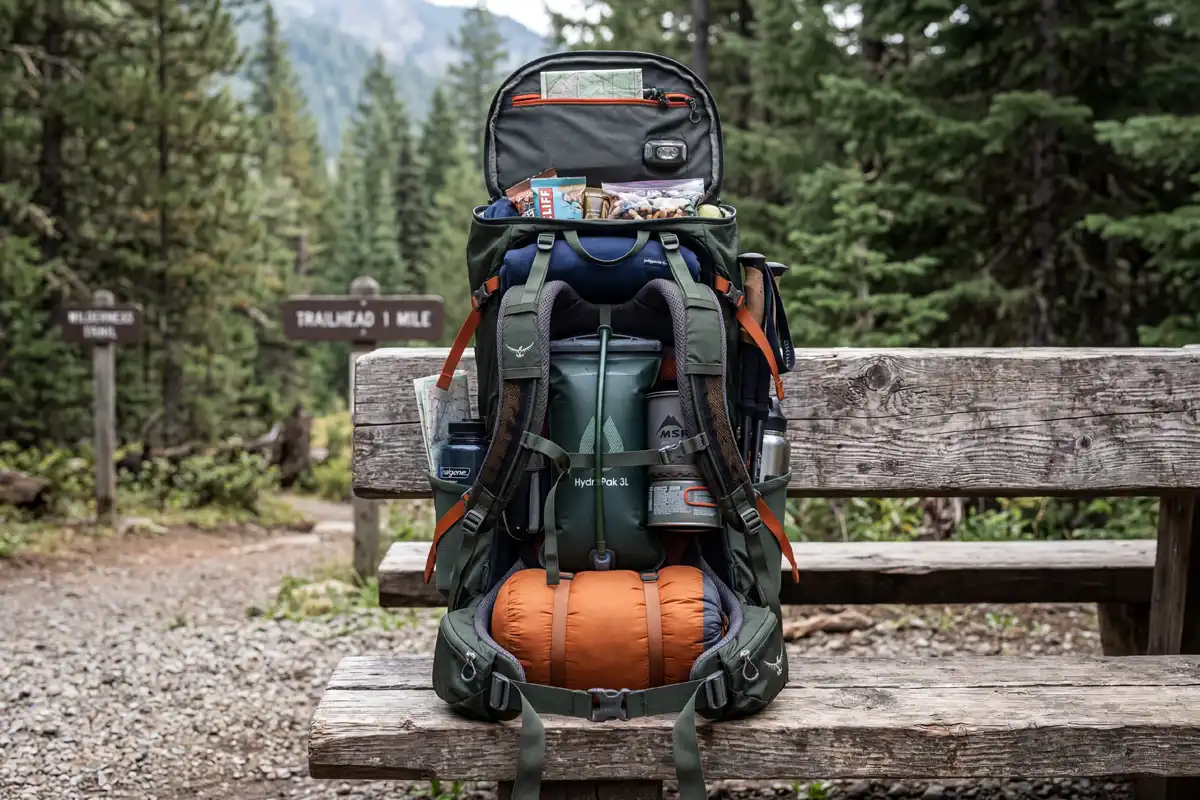
Step 2: Load the Pack in Three Zones

Load zones control your center of gravity. Follow this layout every time:
Bottom zone (lowest, away from back): Sleeping bag, sleeping pad, bulky but light gear. These items go first. They are light and rarely needed mid-hike.
Mid zone (heavy items, close to your back): This is the most important zone. Place your heaviest gear here, directly against the internal frame. Tent body, food canister, cooking pot, water reservoir. Heavy items here keep the pack’s center of gravity over your hips.
Top zone (quick-access items): Rain jacket, snacks, first aid kit, headlamp. These items sit in the top lid pocket or top of the main compartment.
Hip belt pockets: Water bottle, phone, trail snacks for the hour ahead.
Step 3: Fit the Hip Belt First
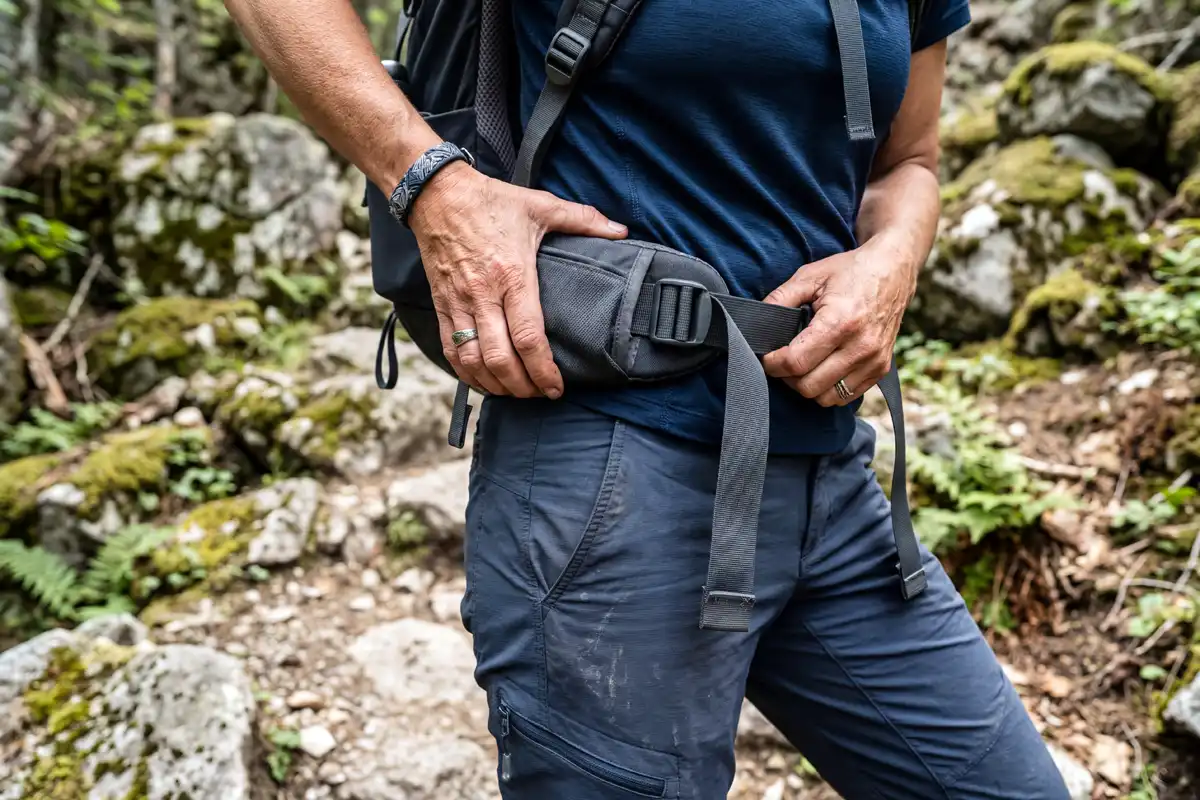
Loosen all straps before putting the pack on. Put the pack on your back and buckle the hip belt. Slide it so the padding sits directly over your iliac crest, not your waist.
Tighten the hip belt until it feels snug with no gap between the belt and your hips. The belt transfers load from the pack frame down into your pelvis and legs.
This step matters most. Get it wrong and every other adjustment fails.
Step 4: Adjust the Shoulder Straps
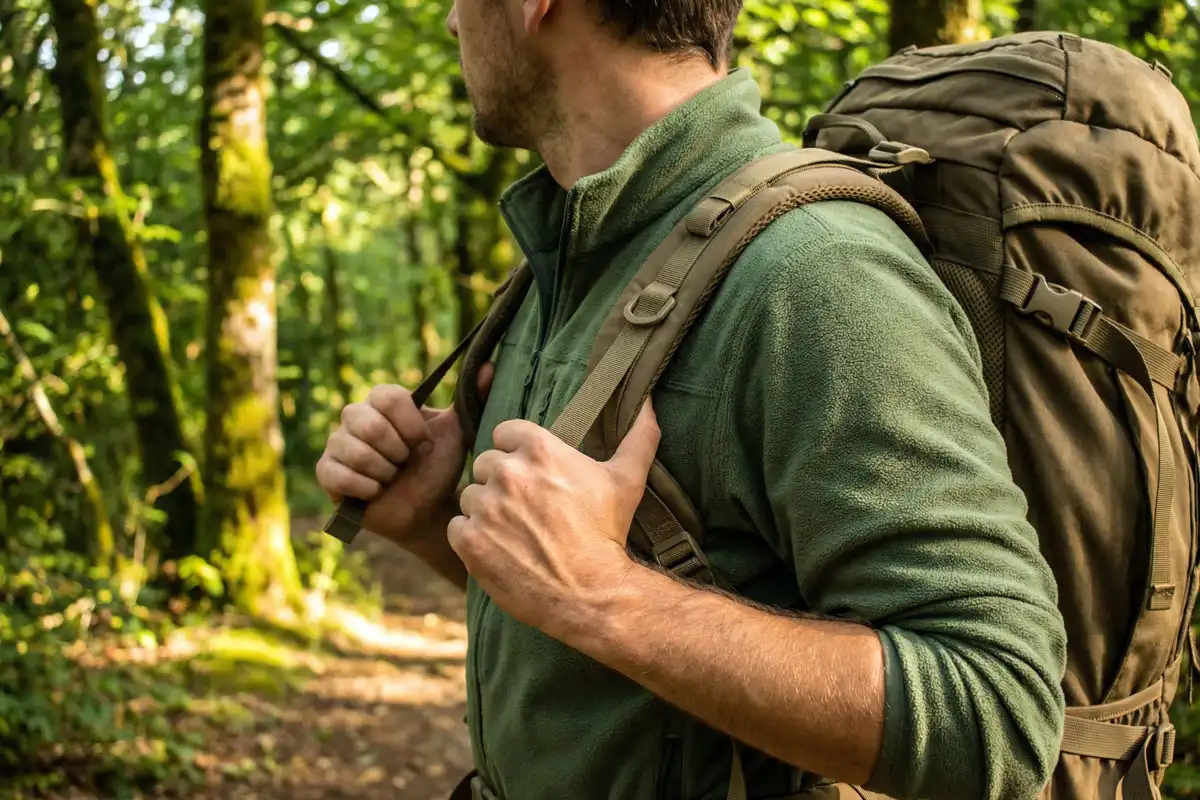
Once the hip belt is secure, pull the shoulder straps down and back until the straps contact your shoulders without pressure gaps. There should be no daylight between the strap and your shoulder.
Do not over-tighten. The strap pads wrap the shoulder but do not bear the load. Straps that are too tight dig in and restrict arm movement. Snug contact is the goal.
Step 5: Set the Load Lifters

Load lifter straps connect the top of the shoulder straps to the top of the pack frame. Pull them to create a 45-degree angle between the strap and the frame.
This angle pulls the pack top toward your upper back. It prevents the pack from sagging away from your body. A pack that leans away from your back multiplies the effective weight on your shoulders significantly.
Step 6: Clip and Adjust the Sternum Strap
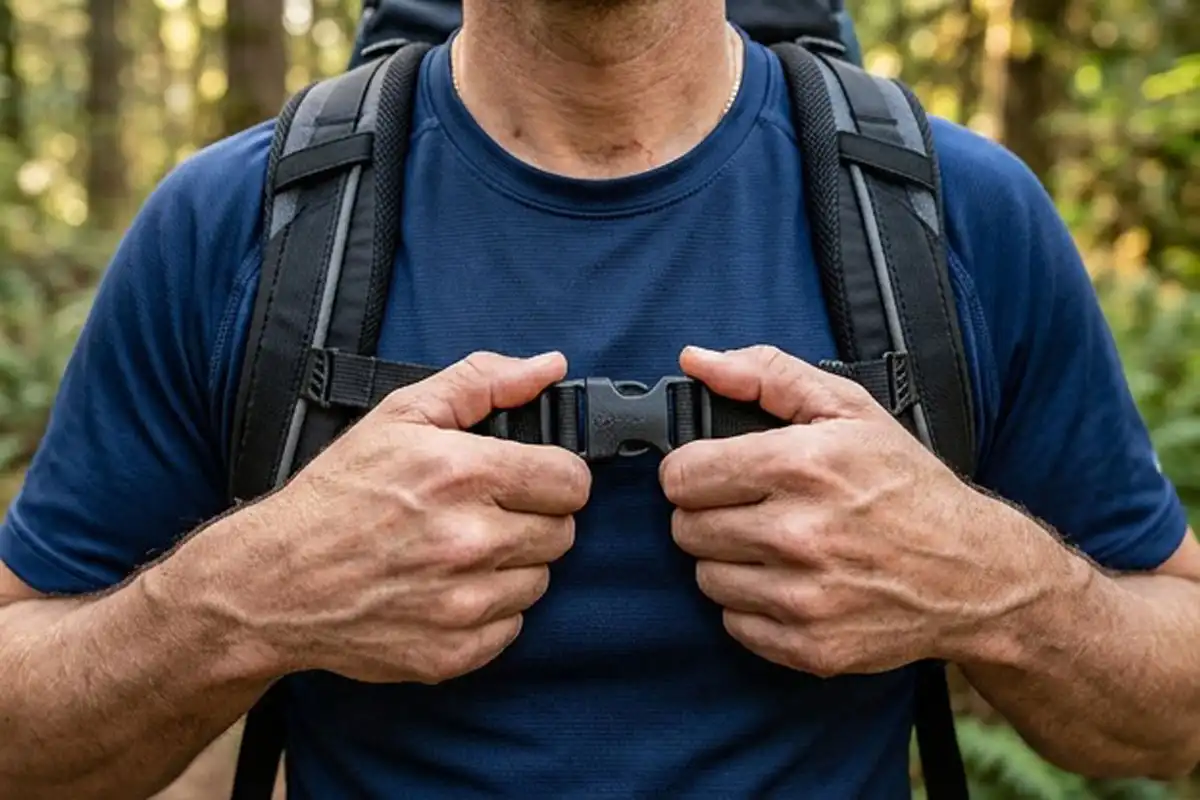
Slide the sternum strap up or down to sit about 1 to 2 inches below your collarbone. Buckle it and tighten gently. It should not compress your chest or restrict breathing.
The sternum strap keeps the shoulder straps from sliding outward on your arms. It stabilizes the whole system during movement.
Step 7: Walk and Retune
Walk 100 meters with the loaded pack. Pay attention to where you feel pressure. Then stop and make small adjustments.
If shoulders feel pressure: loosen shoulder straps slightly and re-tighten the hip belt. If hips feel nothing: re-check hip belt position and make sure it sits over bone, not soft tissue. If the pack sways: tighten the load lifters.
How to Adjust Your Pack on the Trail
Weight distribution shifts as you consume water and food. Adjust the pack every 60 to 90 minutes on long days.
When hiking uphill, loosen the hip belt slightly to allow hip flexion. Tighten shoulder straps a half-turn to keep the pack close. On downhill sections, re-tighten the hip belt and loosen the shoulder straps. This protects your knees and lower back.
I covered managing downhill discomfort in my article on managing knee pain on downhill hikes. Proper pack adjustment connects directly to reducing that strain.
What to Pack to Keep Weight Down
Total pack weight determines how much strain reaches your shoulders even with perfect fit. A general rule: your loaded pack should weigh no more than 20% of your body weight for multi-day trips and 10 to 15% for day hikes.
Choose high-energy snacks that weigh little. I covered this specifically in an article on snacks that provide fast energy. Food weight adds up faster than most hikers expect.
According to the National Institute for Occupational Safety and Health (NIOSH), repetitive loading above the body’s capacity causes cumulative musculoskeletal strain. Backpacking qualifies when total weight exceeds a sustainable range over hours.
Common Packing Mistakes That Cause Shoulder Pain

Packing heavy items at the bottom. This creates a low center of gravity that pulls the pack away from your back. Your shoulder straps compensate by bearing more load.
Skipping the hip belt entirely. Some hikers clip it but never tighten it. An unfastened hip belt transfers zero load from your hips. All weight goes to your shoulders.
Tightening shoulder straps before the hip belt. This locks the pack position before the hips engage. The weight distributes incorrectly from the start.
Ignoring torso fit. A pack sized for a different torso length misaligns the hip belt and shoulder straps. No amount of adjustment corrects a wrong-sized pack.
Overloading the top lid. Heavy items in the top lid pocket shift your center of gravity upward and backward. The pack leans away from your back and increases shoulder strain.
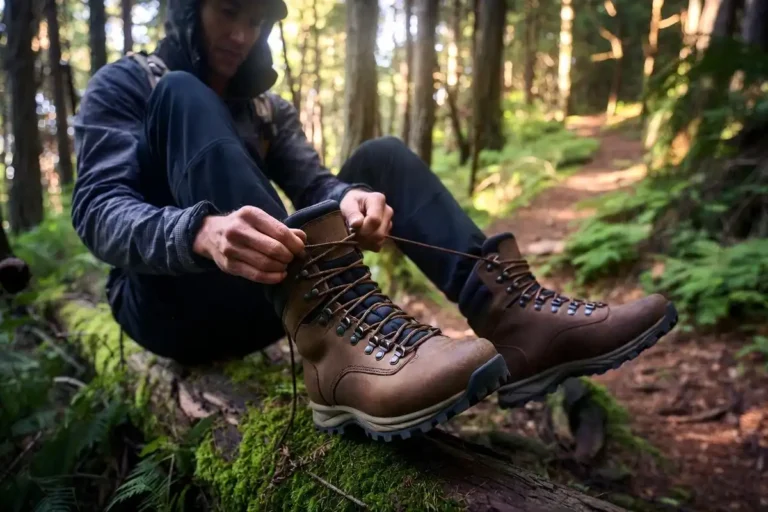
I also covered breaking in new hiking boots, which pairs with proper pack setup for full-body comfort on the trail.
Safety: When Shoulder Pain Is More Than Pack Fit
Persistent shoulder pain after correcting all fit issues signals something else. Nerve compression from straps can cause tingling or numbness in the arm. Stop hiking and remove the pack if this happens.
Adjust the shoulder strap angle or add strap padding before continuing. If pain returns with every adjustment, reduce total pack weight. The National Park Service recommends hikers assess physical limits before starting multi-day backcountry trips.
For your first solo overnight trip, building up load tolerance gradually is safer than starting with a heavy pack. I covered this in my article on planning your first solo overnight trip.
FAQs on Pack a Hiking Backpack to Prevent Shoulder Pain
Should a backpack sit on your shoulders or hips?
A properly fitted backpack rests primarily on your hips. The hip belt transfers 70 to 80% of the load. Shoulder straps provide contact and stability only. If your shoulders carry the weight, the hip belt or pack size needs adjustment.
How tight should shoulder straps be on a hiking backpack?
Shoulder straps should feel snug with full contact along the strap. No daylight between the strap and shoulder. Not so tight they dig in or restrict arm movement. After the hip belt is set correctly, most hikers only need light tension on the shoulder straps.
What is the correct way to position the hip belt?
The hip belt padding sits centered on your iliac crest, the bony shelf at the top of your pelvis. The buckle sits at the front center of your abdomen. The belt should not ride on your waist or drop to your thighs.
Does backpack weight cause permanent shoulder damage?
Carrying excessive weight repeatedly over time can cause cumulative strain in the shoulder muscles, rotator cuff, and cervical spine. Staying within the 20% body weight guideline and fitting the pack correctly reduce this risk significantly for most hikers.
Why does my backpack hurt my shoulders after one hour?
One-hour fatigue usually means the hip belt is not transferring enough load. Check hip belt position first. If it sits correctly, the pack may be too heavy for your current fitness level, or heavy items are packed too low in the main compartment.
Final Thoughts
Shoulder pain from a hiking backpack is almost always a packing or fit problem, not a strength problem. Load heavy items close to your back and near your shoulder blades. Set the hip belt before anything else. Adjust load lifters to a 45-degree angle. Walk, feel, and tune.
Get this right once and it becomes automatic. Your shoulders will thank you on every trail after that.