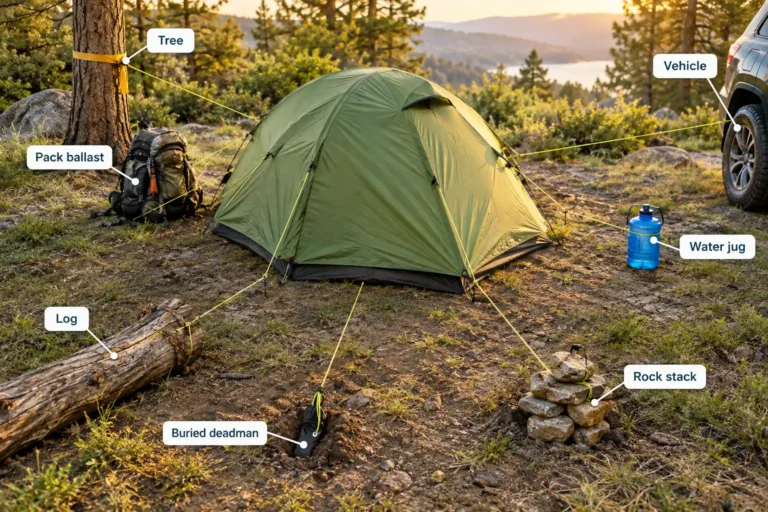
DIY Tent Stakes: 4 Practical Ways to Make Your Own

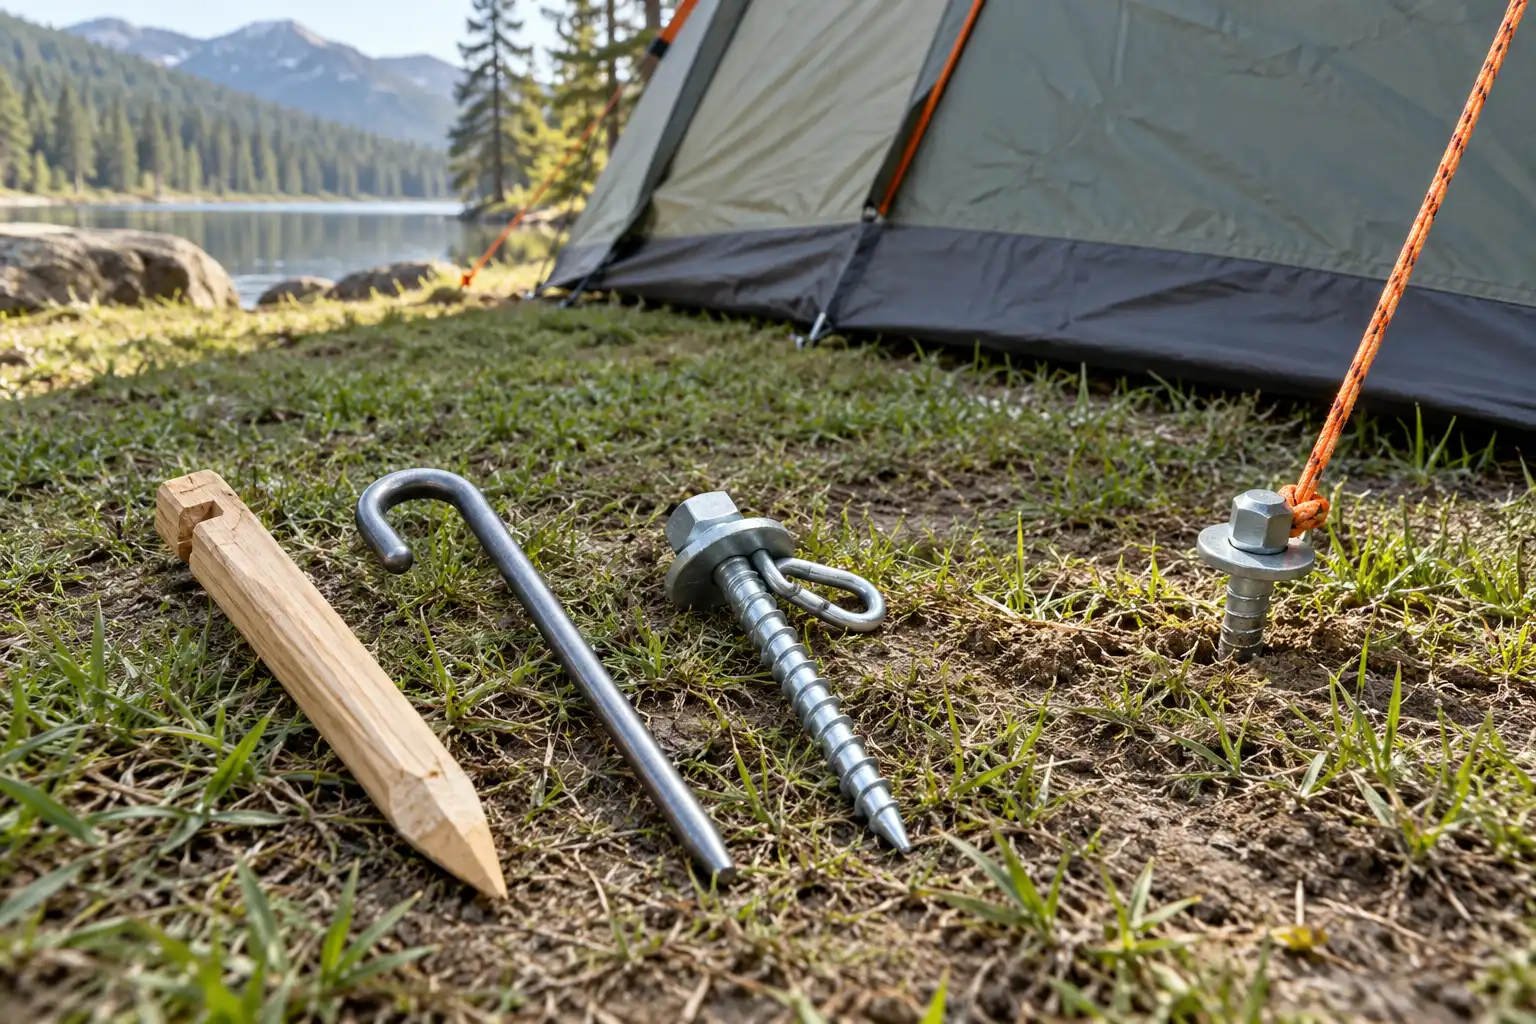
DIY tent stakes can replace missing pegs, help secure a tarp, or give you an anchor better suited to your campsite. I’ll show you four ways to make them, from carved wood to drill-in screws. More importantly, I’ll explain which designs work in firm soil, compact ground, and sand.
For ordinary soil, carve a sturdy wooden peg or bend a thick steel rod into a hook. In hard-packed ground, a long lag screw can work as a drill-in anchor. For loose sand, bury a filled sandbag instead of relying on a narrow peg. Always test the hold before using your shelter.
Choose Your DIY Tent Stake by Ground Type
The shape of a stake matters as much as the material. A thin peg may hold in a lawn but slip easily from loose sand. I use the following guide to choose an approach before cutting or bending anything.
| Ground conditions | Practical DIY option | Main limitation |
|---|---|---|
| Firm soil or grass | Carved wooden peg | Can split in rocky ground |
| Firm soil with few stones | Bent steel rod | Thin rods can bend or pull loose |
| Compacted, relatively stone-free soil | Lag screw with washer and anchor loop | Needs a driver; holding power varies with soil |
| Loose beach sand | Buried sandbag anchor | Requires permitted digging and careful backfilling |
| Very rocky ground, extreme wind, or snow | Purpose-built anchor or approved alternative | Homemade pegs are less predictable |
If you’re setting up on difficult terrain, my guide to pitching a tent on rocky or sandy ground explains how to adjust the rest of the setup too.
Tools, Materials, and a Few Safety Rules
You won’t need every item for every method. Choose the tools for the stake you’re making:
- Wooden pegs: straight deadwood or scrap lumber, a folding saw, a sharp carving knife, and a wooden or rubber mallet.
- Metal pegs: sturdy mild-steel rod, a vise, pliers, a hacksaw, a metal file, gloves, and eye protection.
- Screw tent stakes: long galvanized hex-head lag screws, wide steel washers, short chain links or suitable metal attachment loops, and a socket driver.
- Sand anchors: durable stuff sacks or purpose-made sandbags, strong cord, and a small trowel where digging is allowed.
Before making a batch, count the tent corners and guy-out points that need anchoring. Then check campground rules and avoid places where buried cables, irrigation lines, or protected roots may be present. Never harvest living branches just to make pegs.
Method 1: Carve Wooden Tent Pegs
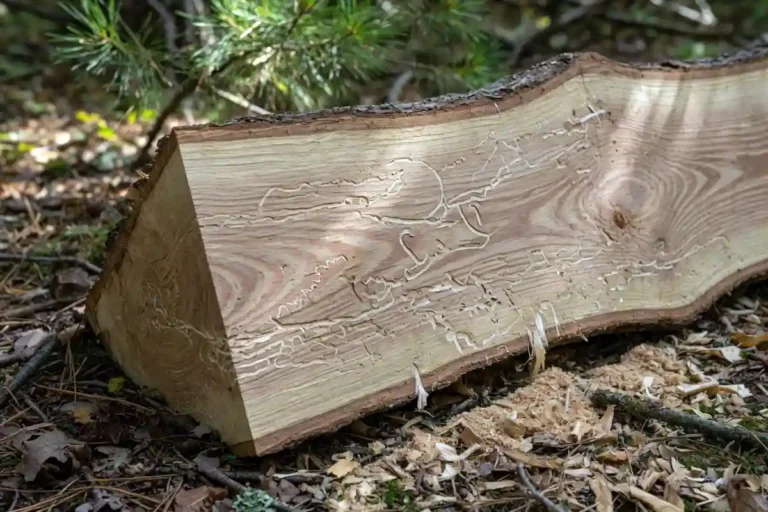
Wooden DIY tent pegs are the simplest option if you need a replacement at camp. Choose sound, straight wood, not a rotten stick that crumbles under pressure. I suggest starting with a piece about 10 to 12 inches long and roughly 3/4 to 1 inch thick. These are working dimensions, not a guarantee of holding strength.
- Cut the wood to length. Use permitted fallen wood or a scrap from home. Trim away any loose, cracked sections.
- Form a tapered tip. Carve several flat faces toward one end. Make a firm point without creating a fragile needle-like tip.
- Cut a cord notch. About 1 to 2 inches below the top, make a shallow stop cut and carve upward toward it to create a small shoulder for the guyline.
- Round the top edge. Chamfer the striking end so a mallet is less likely to split it.
- Test it in soil. Drive it nearly to the notch, attach the loop, and pull gently along the guyline’s direction.
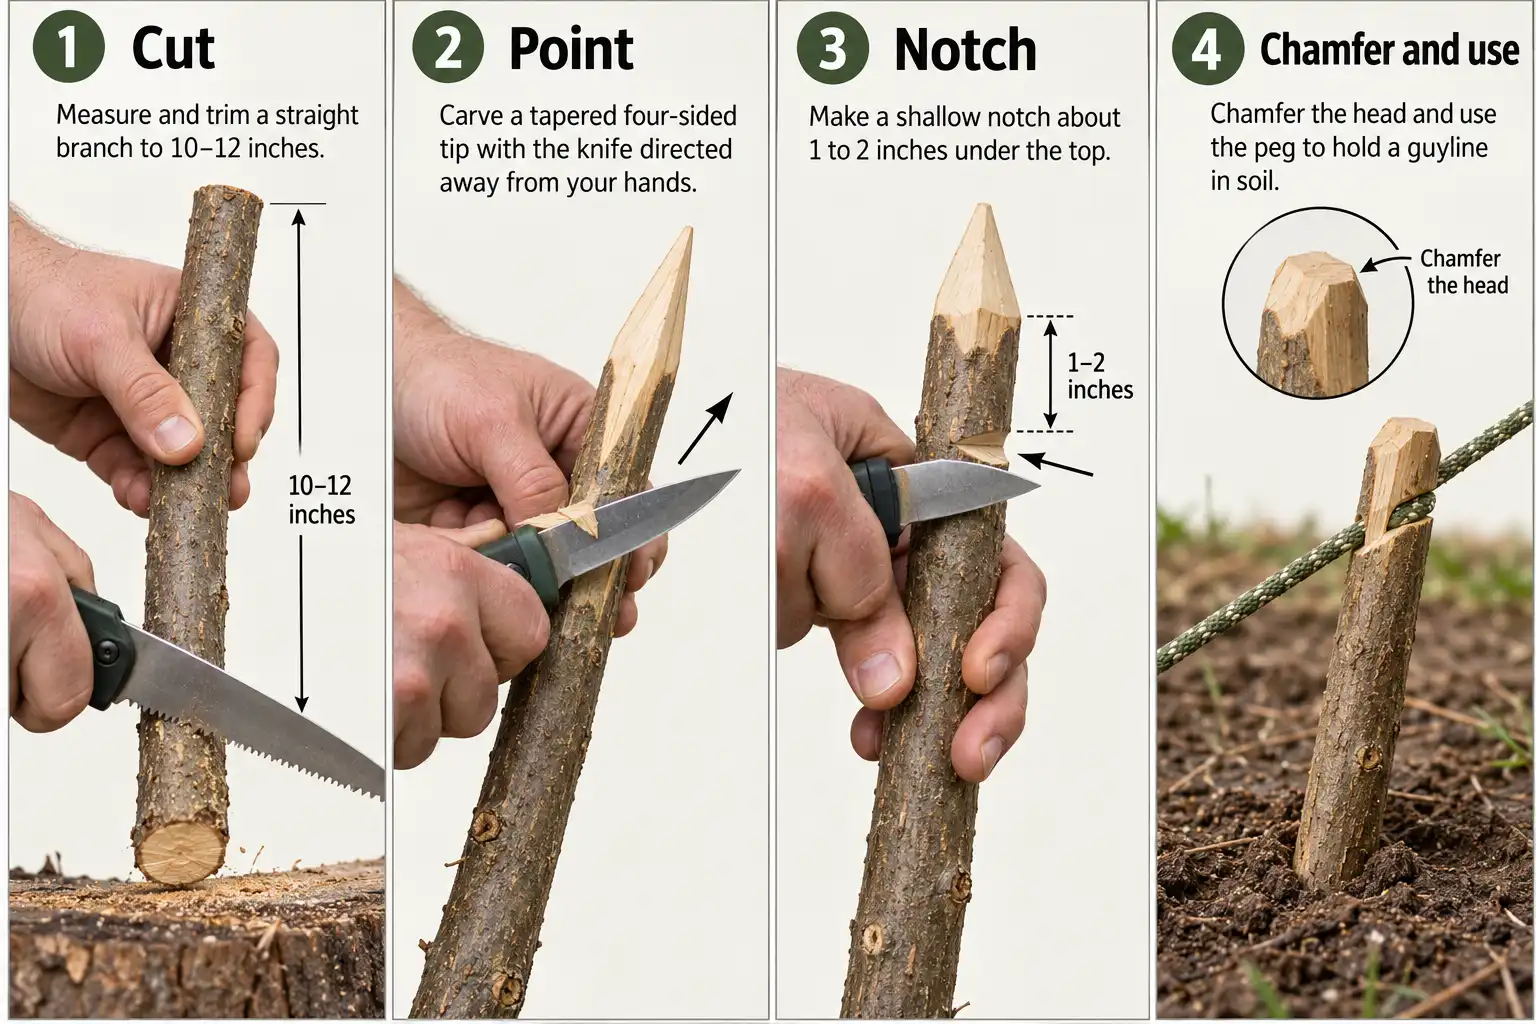
Keep the notch shallow enough to leave solid wood behind it. The Scouts’ tent-peg carving instructions also emphasize careful knife handling and a chamfered top. Work on a stable surface, cutting away from your body.
Method 2: Bend a Steel Rod Into a Hook Stake
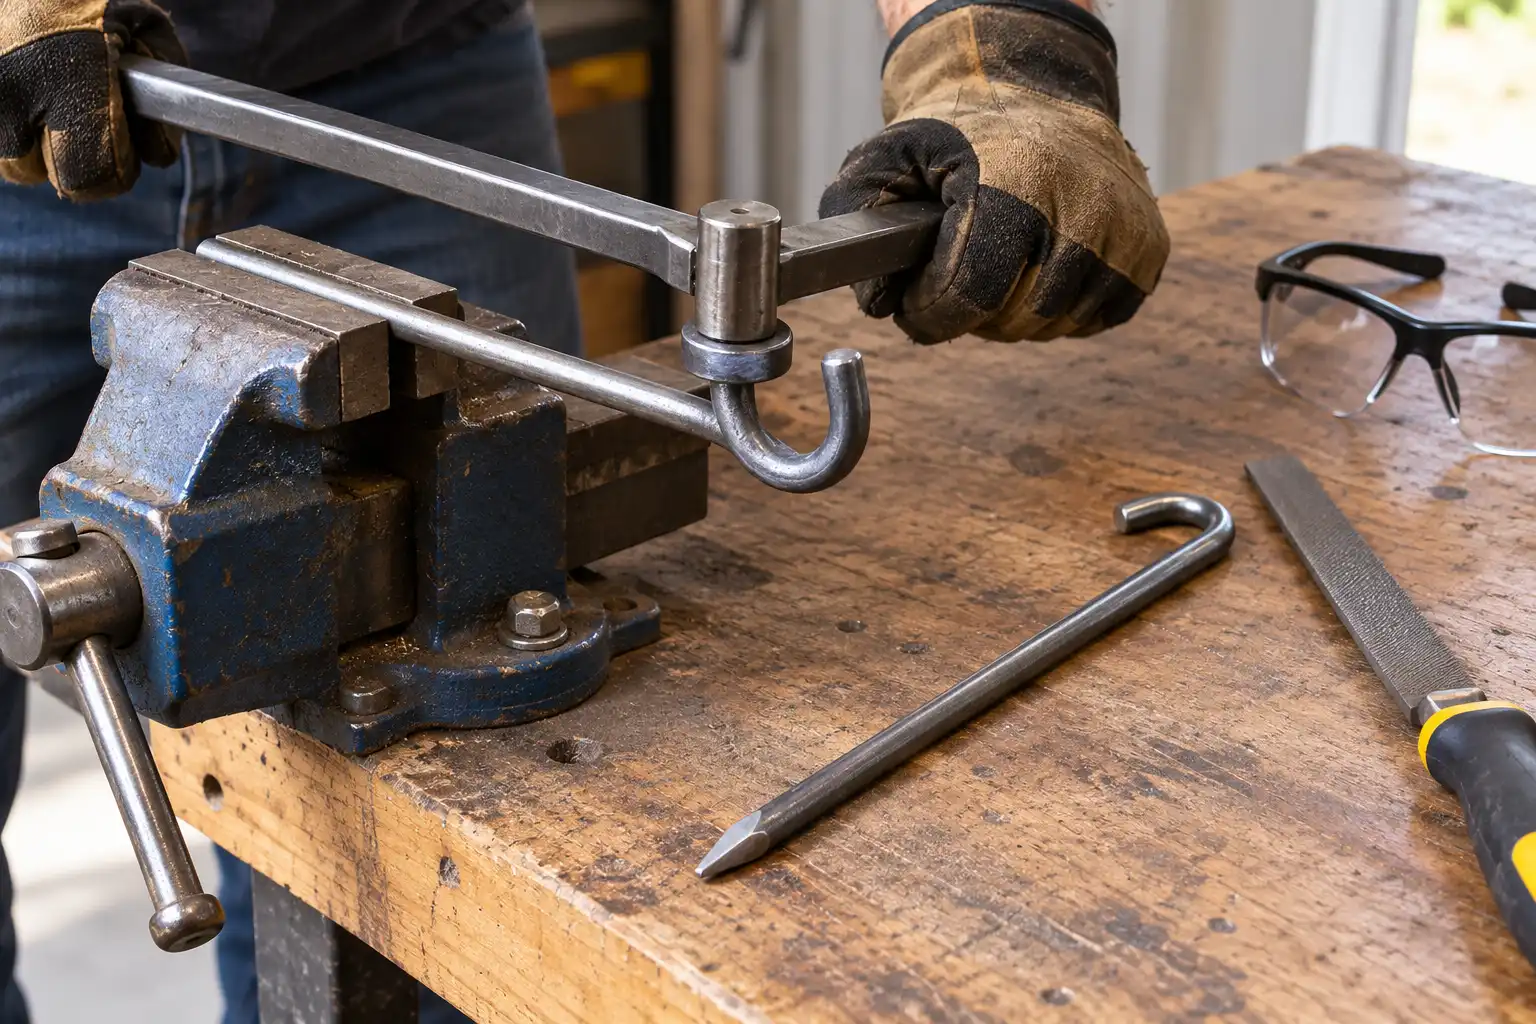
A simple bent rod makes a reusable stake for tents on reasonably firm ground. Unlike a thin coat hanger, a sturdy steel rod has a better chance of keeping its shape during installation. For a light-duty starting design, use bendable mild-steel rod around 3/16 inch thick, then test it against your actual soil.
- Cut a section about 9 to 12 inches long using a hacksaw. Clamp the rod securely and wear eye protection.
- Smooth both ends with a metal file. Taper the ground end slightly without leaving a needle-sharp point.
- Bend a hook into the top inch or so using a vise and suitable pliers or a bending jig. Keep the hook rounded and the opening narrow enough to retain a tent loop.
- Inspect the bend for cracks or sharp edges. Reject any rod that looks damaged.
- Try it in firm soil and check that the hook stays close to ground level after installation.
This style is convenient for calm-weather camps, but it doesn’t offer the surface area of a wider Y-shaped stake. If it bends or shifts during a firm hand test, don’t rely on it.
Method 3: Make Drill-In Tent Stakes From Lag Screws
Long lag screws provide an alternative when the ground is compact enough to grip their threads. Washers and chain links create a low-profile tie point, but homemade screws lack a certified load rating.
- Choose a long hex-head lag screw made from corrosion-resistant steel. Avoid short household screws.
- Add a metal attachment point. Slip a short, suitably sized chain link or closed metal loop beneath a wide washer and the screw head. Make sure the washer retains the link.
- Position the screw on a cleared, permitted patch of compacted soil. Keep tent fabric and guylines clear of the spinning hardware.
- Drive it slowly with the correct socket, stopping with the washer and link near ground level. Stop if the screw spins without gripping or strikes an obstruction.
- Attach the guyline to the fixed link, tension it gradually, and check for movement. Reverse the driver to remove the screw later.
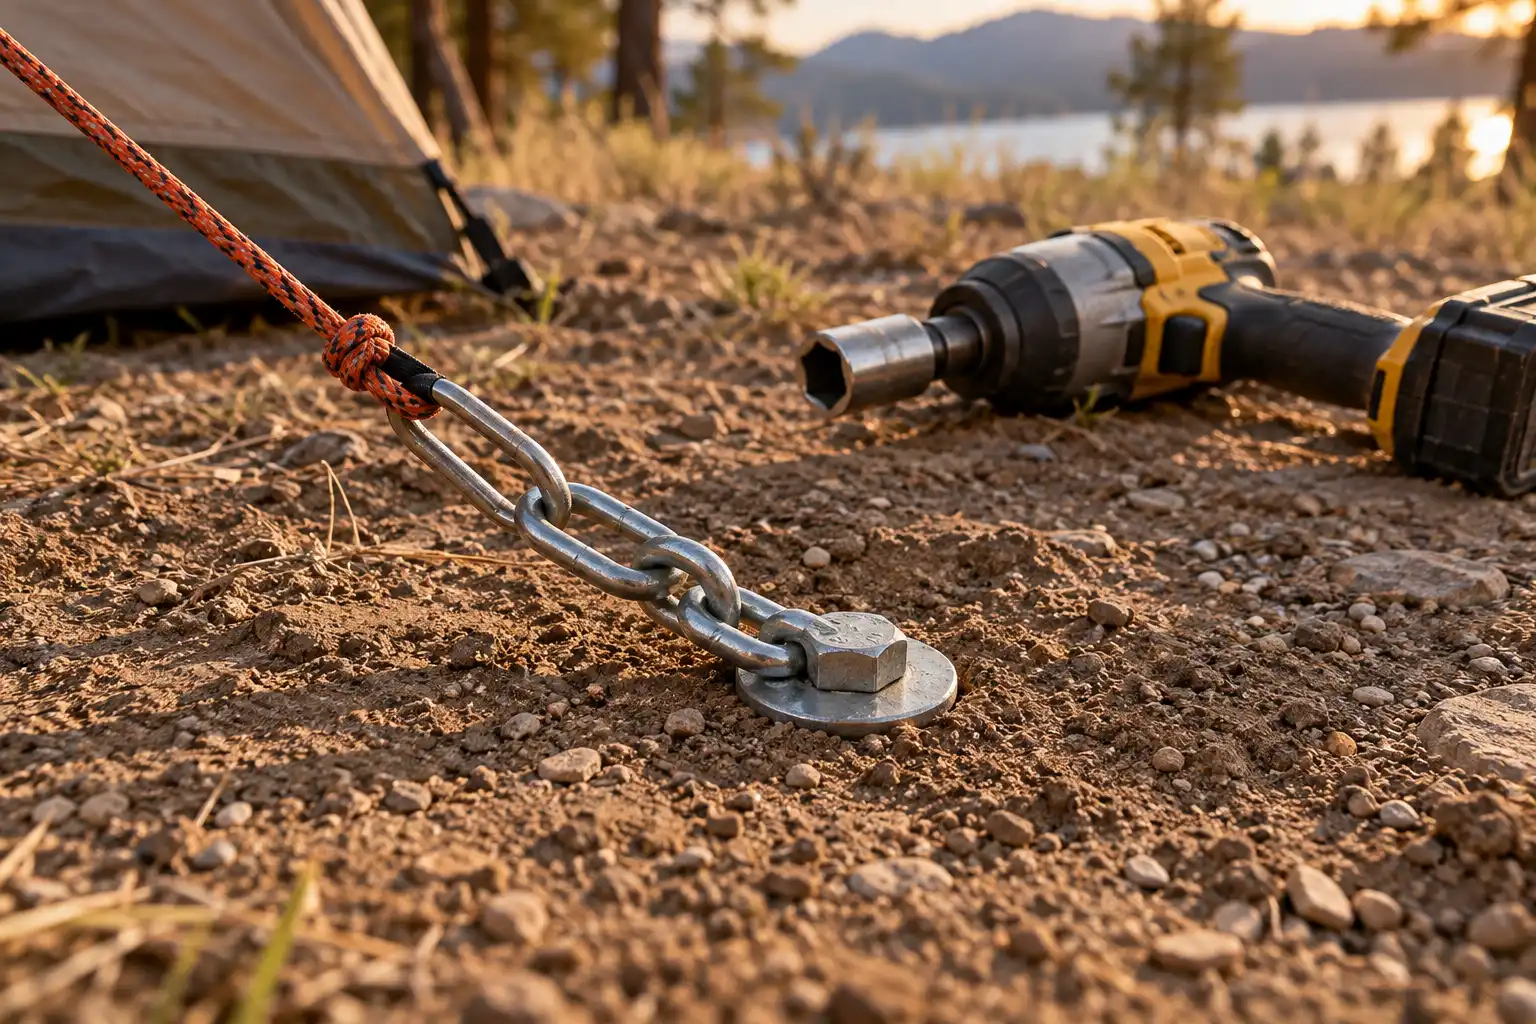
I treat this hardware-heavy method as a car-camping option. These are drill-in tent stakes, not helical sand anchors. They need soil that actually grips the threads. The Burning Man Project’s anchor guidance describes the long-lag-screw approach for its particular compacted ground conditions; that does not make the method suitable everywhere.
Method 4: Make a Buried Sandbag Anchor
In loose sand, wider buried anchors generally work better than narrow DIY pegs. That’s why I would make a deadman-style sand anchor rather than improvise a skinny screw stake for a beach tent.
- Fill a tough bag with sand. Use a durable sack with a secure webbing attachment, not a thin shopping bag or a weak drawstring alone.
- Tie on the guyline or a short cord extension to a strong attachment point, checking that the stitching won’t tear.
- Dig a hole beyond the tent corner, only where local rules permit. Make it deep enough to bury the full bag beneath compacted sand.
- Lay the bag on its side. Route the cord through a shallow channel toward the tent so it won’t lift the bag straight upward.
- Refill and compact the sand. Tension the line slowly; rebuild the anchor if you notice movement.
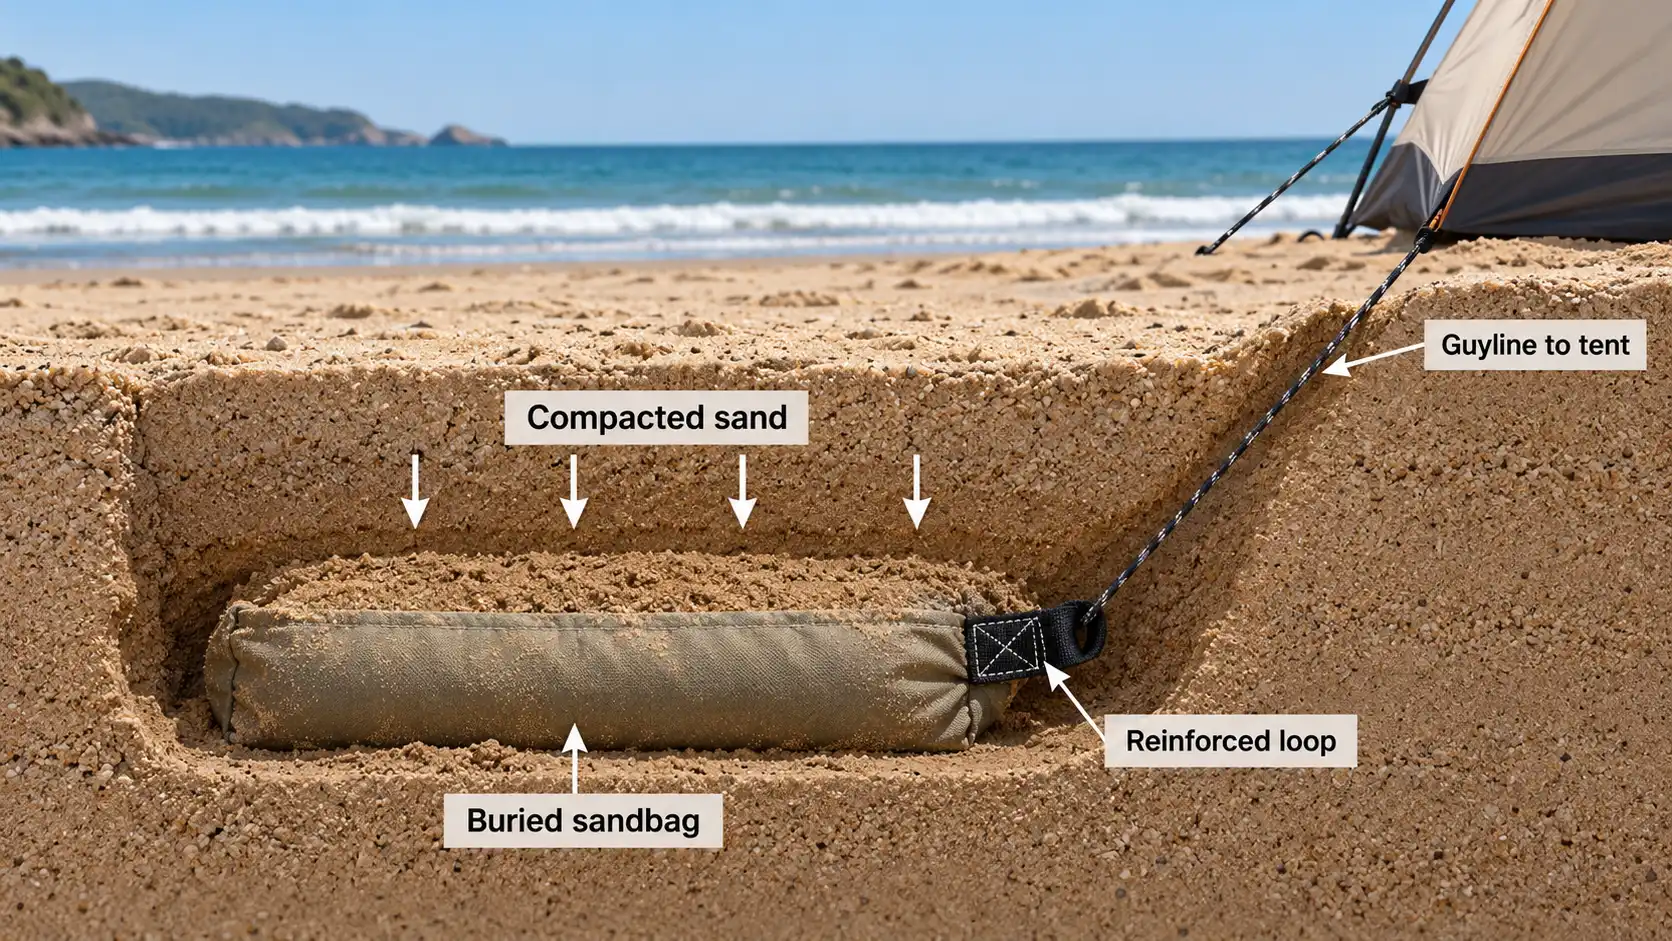
This approach is useful for small camping tents, but it has no fixed load rating. Also, stay out of dunes, nesting areas, and protected vegetation. For another option when ground penetration isn’t possible, see how I secure a tent without traditional stakes.
Install and Check Your Homemade Stakes
Even a neatly made stake can fail if the soil is weak or the tent pulls at a poor angle. I focus on four checks:
- Check the ground first. Press a test stake into soil away from exposed roots and buried services. If it slides in without resistance, consider a wider or buried anchor.
- Set the stake deep. In typical soil, start nearly vertical and leave only enough of the head showing to hold the cord. REI recommends vertical placement for maximum holding power in most soils.
- Tension the tent evenly. Tighten opposing corners in stages. Follow your tent’s instructions for guylines and added wind supports.
- Test and recheck. Pull steadily by hand along the guyline, not with a sharp jerk. If the stake rocks, rises, or turns, change the anchor or campsite. Recheck after rain and wind.
At teardown, pull on the anchor itself, not on tent fabric or loops. A hand test can reveal an obviously weak anchor, but it cannot prove that homemade hardware will withstand sudden gusts. For exposed camps or serious weather, I prefer purpose-built stakes with guidance from the tent manufacturer.
Mistakes That Make DIY Tent Stakes Unreliable
- Using thin coat hangers or short nails: They may bend easily or pull free in soft soil.
- Leaving sharp metal exposed: Upright rebar and long projecting hardware create serious trip and injury hazards. I avoid rebar stakes around ordinary campsites.
- Overdriving screws: A spinning screw with stripped soil around it has lost its grip. Move it rather than forcing it deeper.
- Assuming all sand is alike: Dry, loose beach sand may need a buried anchor even if a screw worked on firm damp sand nearby.
- Tying directly to sharp metal: Add a smooth attachment loop, and keep the guyline away from threads, burrs, and edges.
- Ignoring site rules: Don’t dig holes or disturb vegetation in protected places. Pack out every scrap of metal and cord.
Canopy Stakes for Sand Need Stronger Planning
A pop-up canopy catches more wind than a small low-profile camping tent, so I wouldn’t use my homemade wooden or wire pegs as its main anchors. Instead, follow the canopy manufacturer’s requirements for weight bags, guyline attachments, and approved sand anchors.
For beach use, fitted sandbags or purpose-made ballast secured to each leg, as described in ShelterLogic’s canopy guidance, are usually a more appropriate starting point than ordinary tent pegs. Check your canopy’s required ballast weight.
Additional guyline anchors may also be required by the manufacturer. However, neither buried DIY bags nor loose weights provide a universal wind rating. Take the canopy down when conditions approach its stated limits or the frame begins to lift or flex. This is especially important where people might walk beneath it.
When Buying Stakes Makes More Sense
DIY anchors are useful backups, but some campsites call for specialized equipment. I would use purpose-made wide sand stakes or sand anchors for exposed beaches, heavy-duty ground anchors for canopies, and stakes designed for snow or demanding wind conditions.
Likewise, I wouldn’t replace every factory stake before a long trip just to save a little money. A damaged anchor can also strain a tent corner or guyline. If you’re packing for a few nights away, include a spare stake or two with the supplies in your two-night camping checklist.
Care for the Stakes and Leave the Campsite Clean
After the trip, wash soil and salt from metal hardware and let everything dry before storage. Check wooden pegs for splits, steel hooks for bending, and screw threads for damage. Keep sharp points in a sleeve or separate pouch so they don’t puncture your tent bag.
Finally, remove every anchor and fill any holes you dug. If the site doesn’t allow digging or ground penetration, use an approved non-penetrating system or camp elsewhere. Good DIY gear should solve a problem without creating one for the next visitor.
Final Thoughts
For DIY tent stakes, I recommend choosing the ground first and the materials second. A carved wooden peg is a useful emergency fix in firm earth, while a bent steel hook is a reusable light-duty option. Lag screws can suit some compacted soils, and buried sandbags make more sense in loose sand. I wouldn’t trust any homemade anchor solely because it looks sturdy. Test it, follow the shelter’s instructions, and switch to proper equipment whenever conditions demand it.