How to Wash Dishes While Camping: 7 Simple Steps

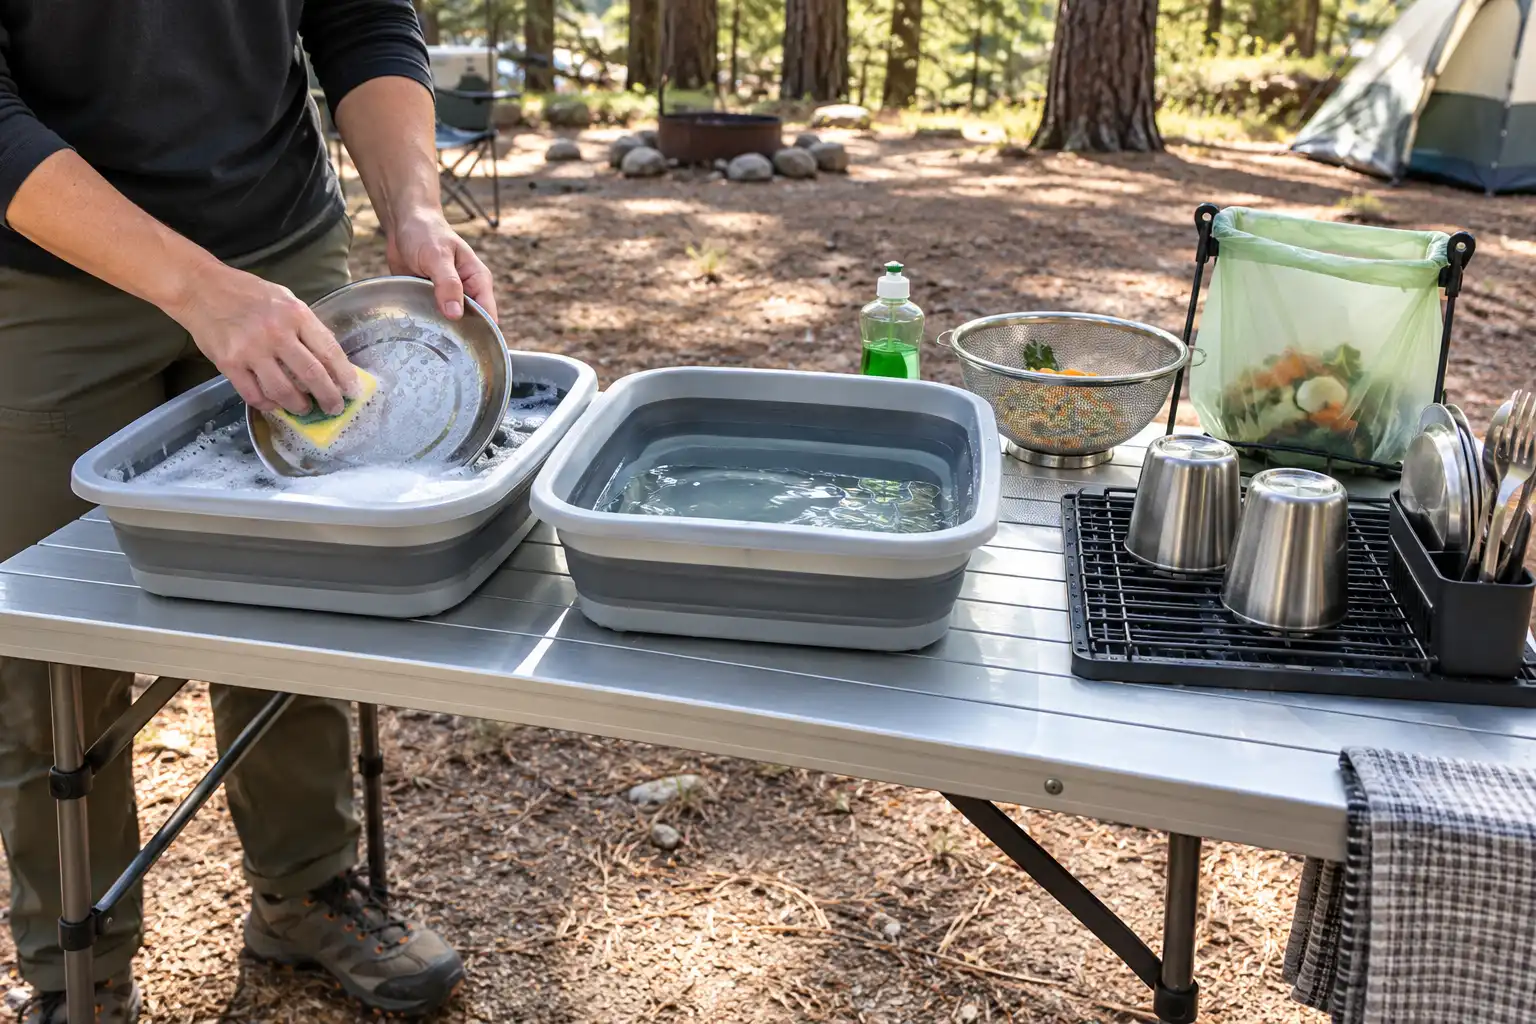
Knowing how to wash dishes while camping helps you keep cookware clean without wasting water or leaving food behind for wildlife. You don’t need a kitchen sink. Instead, a scraper, two small containers, clean water, and a plan for wastewater can handle cleanup at most campsites.
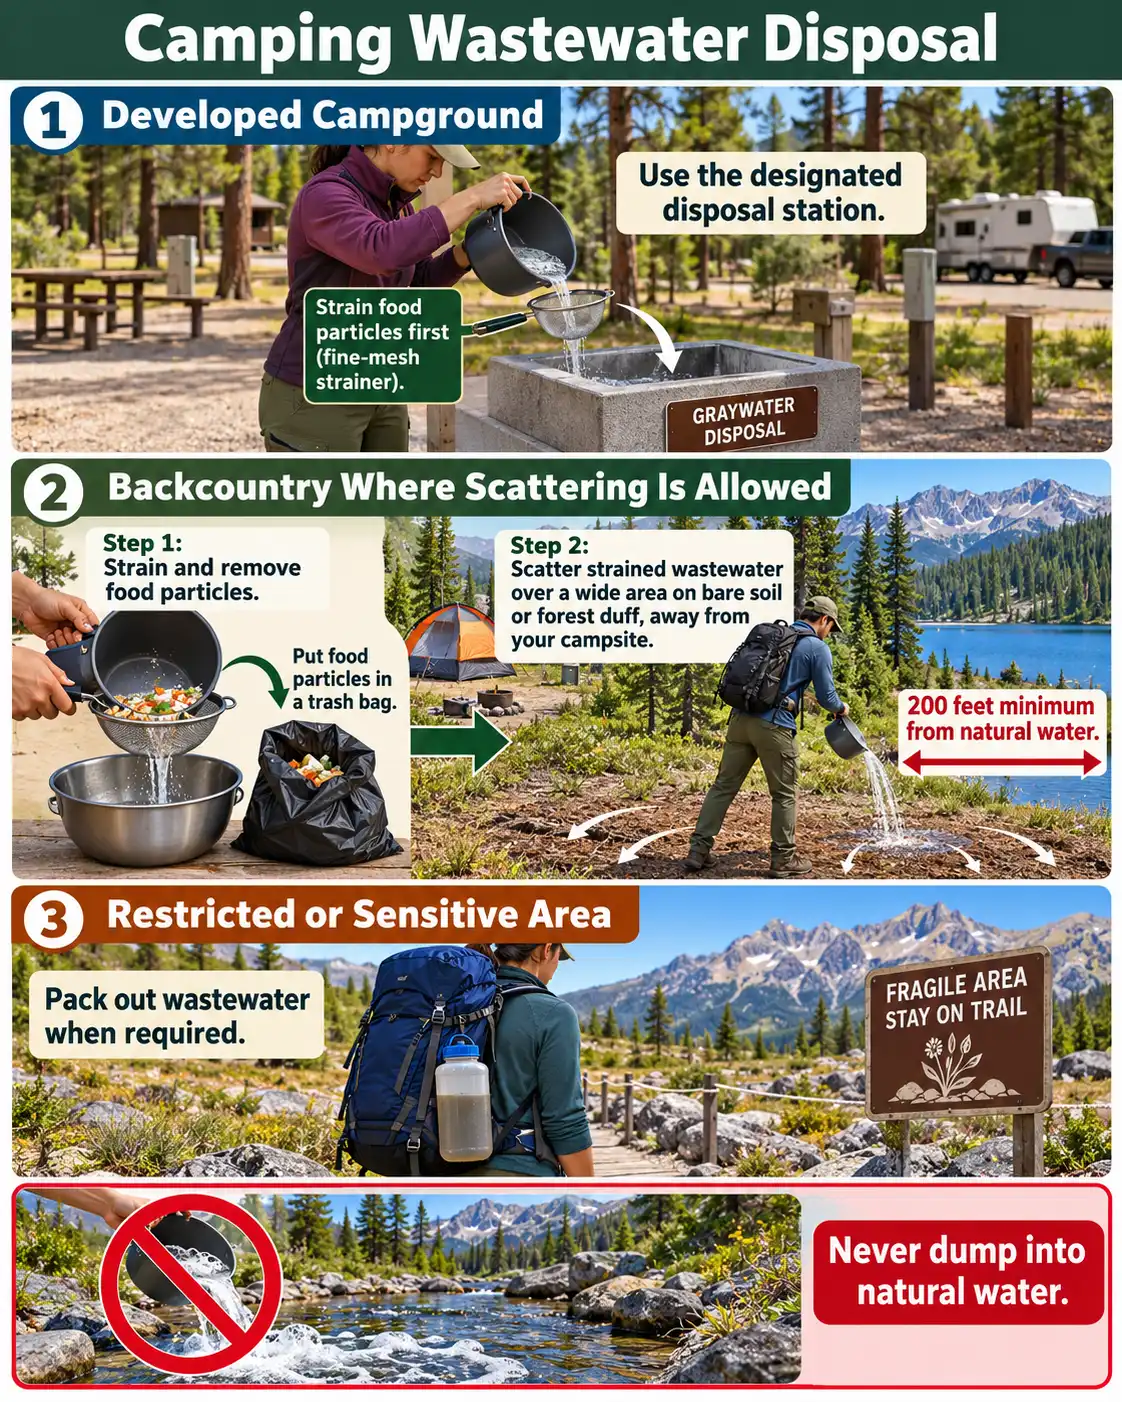
Scrape leftovers into a trash bag, wash dishes in warm water with a little soap, rinse with clean water, and air-dry. Strain the used water. Use a designated campground disposal station when available. In the backcountry, scatter strained wastewater at least 200 feet from natural water sources, if local rules permit.
What You Need to Wash Camping Dishes
I recommend packing a compact cleaning kit alongside your cooking gear:
- Two small basins: One for washing and one for rinsing. Collapsible tubs save space when car camping.
- A scraper and sponge: Use a silicone spatula or pot scraper and a nonabrasive scrub pad, especially for coated cookware.
- A little biodegradable dish soap: Choose an unscented, phosphate-free option and use as little as you need.
- A fine-mesh strainer: This catches rice, crumbs, and other food particles before you dispose of dishwater.
- Safe water and a small pouring bottle: Bring potable water or water you’ve properly treated for cleaning and rinsing.
- A drying surface and trash bag: A clean rack or mat keeps dishes off the ground, while a secure bag holds food scraps.
For longer trips, I include washing and rinsing in the amount of water I plan to bring. However, if your campground provides a dedicated dishwashing sink, you may not need to unpack the basins.
How to Wash Dishes While Camping, Step by Step
Step 1: Choose the Right Washing Spot
First, check for a designated dishwashing area. Campground sinks and graywater disposal facilities are usually the simplest option, and posted rules take priority over general backcountry advice.
Without a facility, carry your water to a durable washing spot at least 200 feet (about 70 large steps) from lakes, streams, and springs. Keep the area away from your sleeping space and other campers’ paths. In bear country, I would keep food odors and cleanup activities well away from the tent, following local wildlife guidance.
Step 2: Scrape Food and Grease Into the Trash
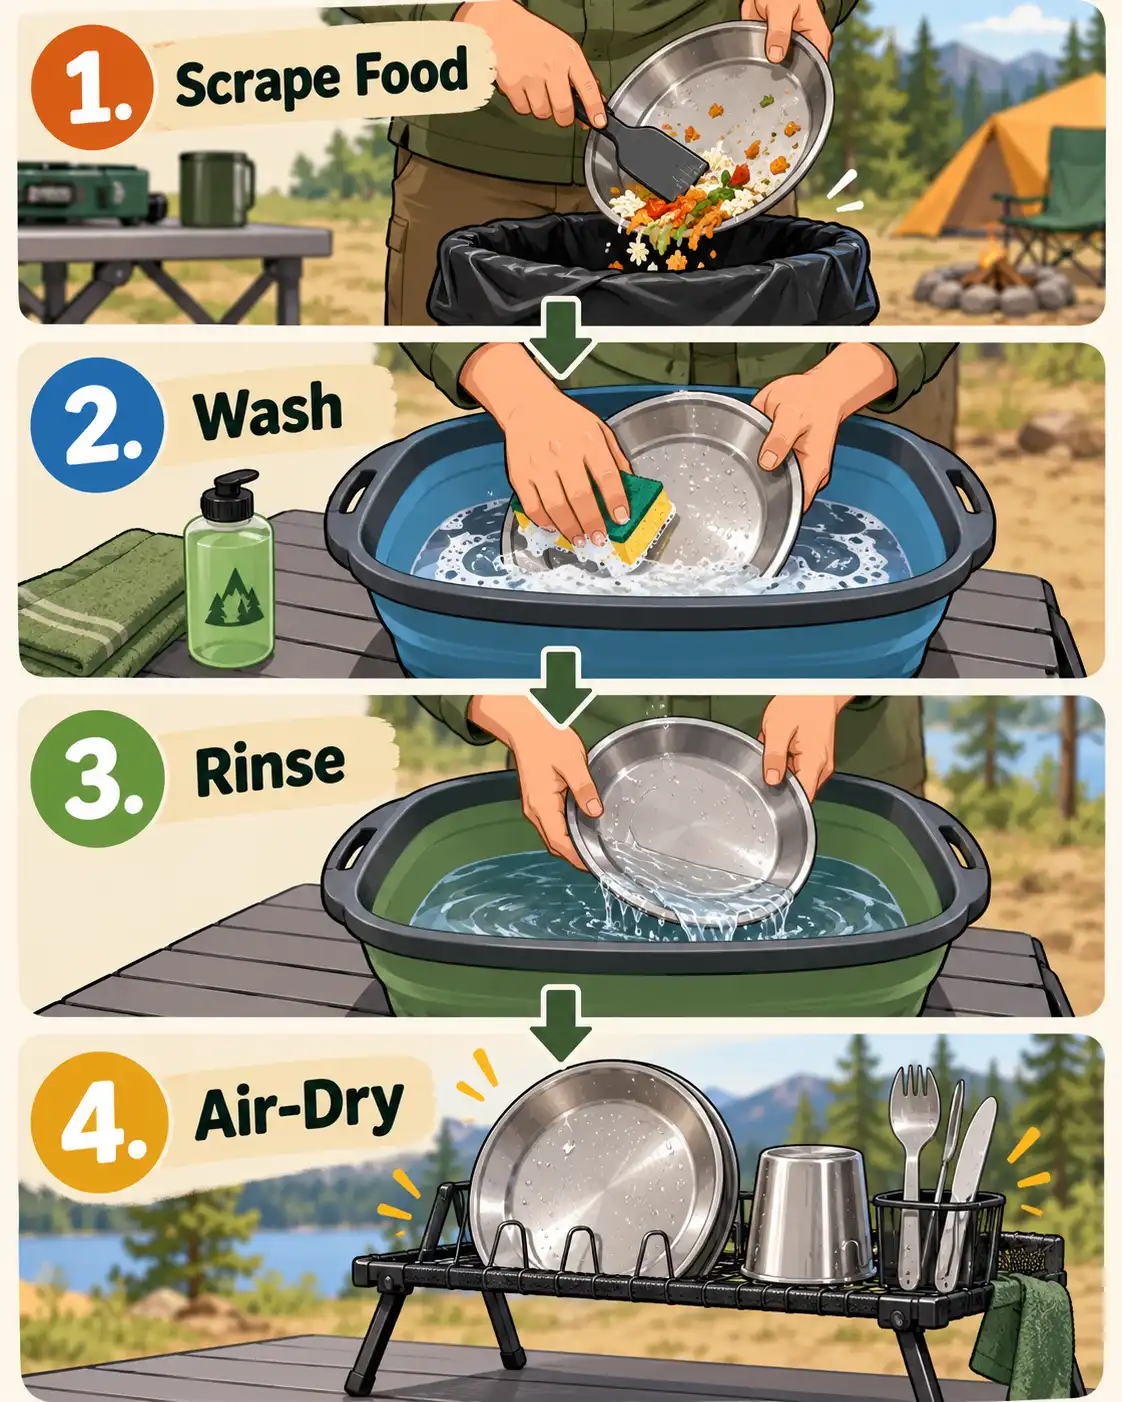
Remove every practical bit of food before adding water. For example, a scraper lifts rice, sauce, and soft leftovers. Put scraps straight into a secure trash bag, not into the fire pit or bushes.
Next, wipe cooled grease from skillets with a small piece of paper towel and pack the towel out. That way, you have less oily water to dispose of and less scrubbing to do. Don’t pour leftover cooking oil onto the ground. If food has dried onto a pot, add a little warm water and let it soften while you organize the rest of the dishes.
Step 3: Prepare Separate Wash and Rinse Water
Pour a modest amount of warm, safe water into the first basin and add a few drops of dish soap. Then fill the second basin with clean water for rinsing. Keep the rinse water separate from dirty sponges and scraped food.
Warm water helps with oily cookware, but it only needs to be comfortable to handle, not boiling. If you collect water from a natural source, boil it or use an appropriate filtration and disinfection method rather than assuming clear-looking water is safe for the final rinse.
Step 4: Wash the Cleanest Items First
Start with drinking cups and lightly soiled utensils. Then scrub bowls and plates, leaving greasy pots and pans until last. As a result, your wash water stays usable for longer.
Use the sponge or pot scraper to clean the inside, outside, handles, and rims. Also, pay extra attention to fork tines and the edges of cutting boards. Avoid abrasive sand or rough stones on nonstick coatings. If the water turns heavily greasy or full of food, replace it rather than adding more soap.
Step 5: Rinse With Clean Water
Move each washed item into the clean rinse basin, or pour a little safe water over it from a bottle. Remove visible suds and loosened residue from both sides.
Instead of repeatedly filling a large tub, use a controlled pour to save water. Change the rinse water when it becomes cloudy or soapy. I wouldn’t finish with untreated river or lake water because that can put contaminants back onto dishes you just cleaned.
Step 6: Let Everything Air-Dry
Place rinsed plates, utensils, and cookware on a clean drying rack or mat where air can circulate. Keep them above the dirt and away from splashing wash water.
In addition, air-drying avoids transferring grime from a reused camp towel. If you must towel-dry something, use a fresh, clean towel. Finally, check that cups and nested pots are dry before storing them, especially in cold or humid conditions. Dry cast iron promptly and care for its seasoning according to the maker’s instructions. Don’t leave the dishes outside overnight where wildlife may investigate lingering food smells.
Step 7: Strain and Dispose of the Wastewater
Combine the used wash and rinse water, then pour it through a fine-mesh strainer. Pack out everything the strainer catches, including tiny food scraps.
At a developed campground, use the approved dishwater drain or collection point. Don’t assume the drinking-water faucet, bathroom sink, or nearby ground is an approved disposal area. If you’re unsure, ask the campground host.
In the backcountry, when local rules allow, scatter strained water widely over soil at least 200 feet from lakes, streams, and springs, and well away from camp. Avoid creating a puddle that concentrates food odors. However, some protected or sensitive places require you to carry wastewater out instead. That’s why I plan how to handle camping graywater before leaving home.
Even biodegradable soap does not belong directly in a stream or lake. The Leave No Trace wastewater guidelines recommend straining food scraps and keeping dishwashing at least 200 feet from natural water.
Washing Dishes While Backpacking With One Pot
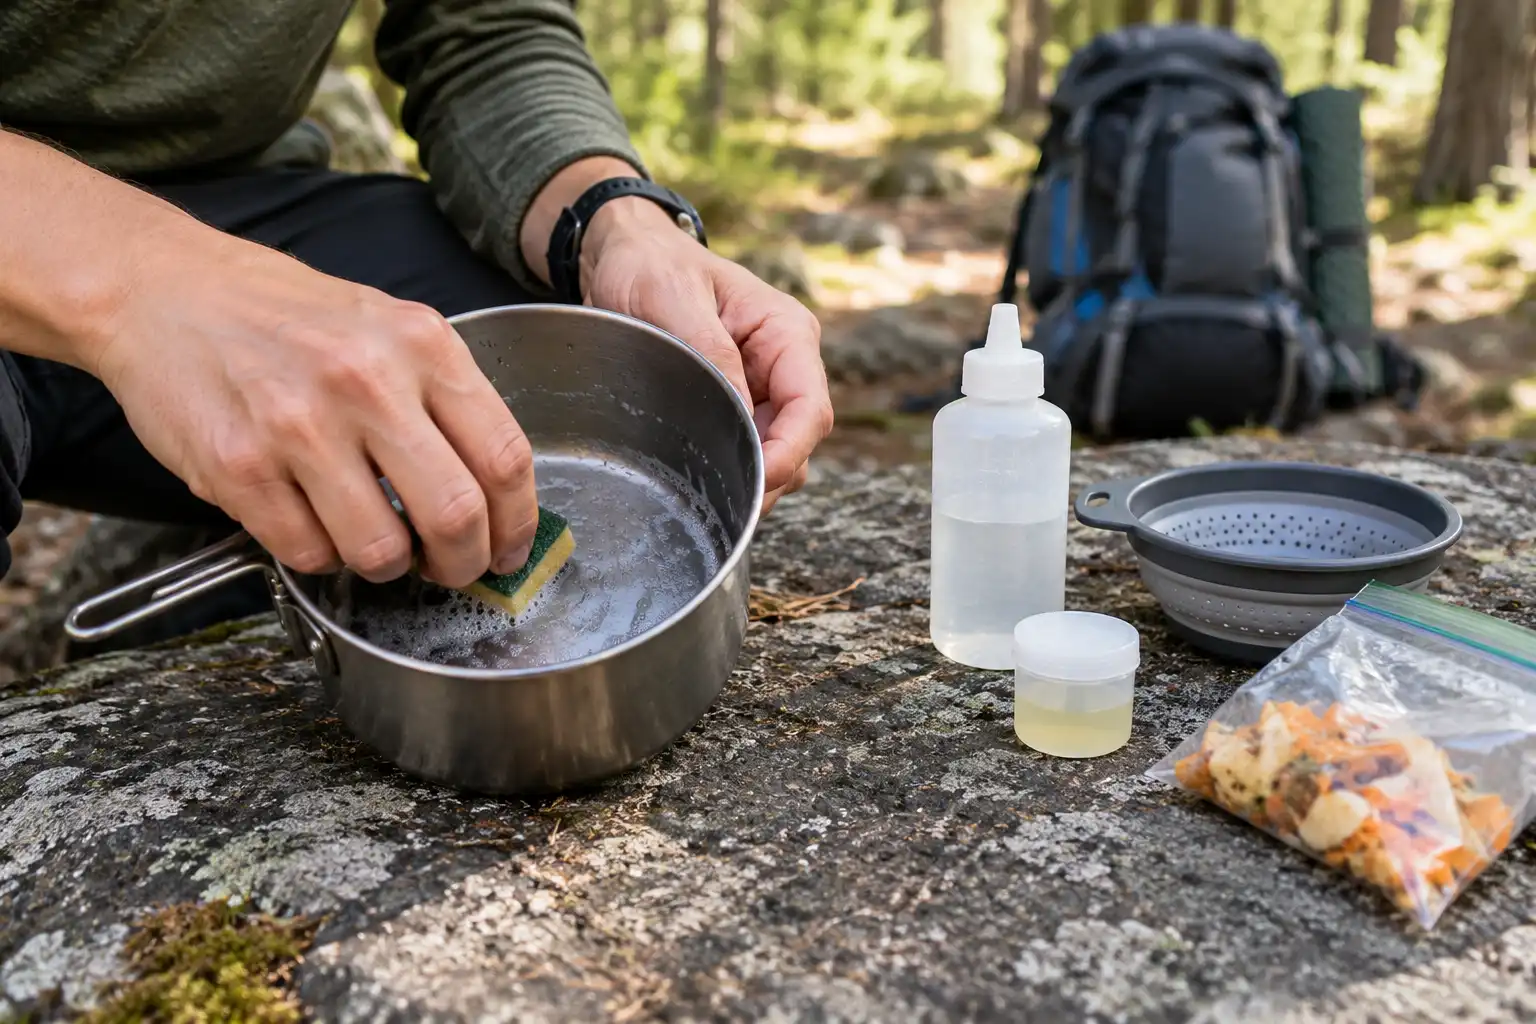
You don’t need to carry two tubs on a lightweight trip. Instead, I suggest using your cooking pot as the wash container and a bottle of treated water for the rinse.
First, scrape and pack out food. Then add a small amount of warm water, a drop of soap if needed, and scrub the pot and utensils. Pour out the washing water into a separate container if necessary, rinse the pot with a measured splash of clean water, and strain all wastewater before disposing of it according to local rules.
For a short overnight trip, another option is to seal the dirty cookware and wash it properly at an equipped site or at home. That is safer than leaving soap or food particles in the landscape. Keep dirty gear separated from clean eating utensils until you’ve washed it.
Food Safety: When to Sanitize Camping Dishes
Ordinary washing removes food and grime, but sanitizing provides additional protection when utensils or boards have touched raw meat, poultry, seafood, eggs, or their juices. So I keep those items separate from anything used to serve cooked food.
First, wash contaminated items thoroughly with soapy water. Then rinse with safe water and use a food-contact sanitizer according to its label. At developed campsites, the National Park Service describes a separate wash, rinse, and sanitize system. Never mix bleach or sanitizer directly with dish soap, and let sanitized items air-dry.
Also wash your hands with soap and safe water before food preparation and after handling raw ingredients, as the USDA’s camping food-safety guidance recommends. For example, a clean-looking knife is not necessarily ready to slice bread after cutting raw chicken. I treat clean utensils as an essential part of preventing food poisoning at camp, not a chore to skip after dinner.
How to Use Less Water and Make Cleanup Easier
The easiest way to save water starts before dinner. Choose meals that use fewer pots, and measure your cooking oil rather than adding more than the food needs. For example, preparing a filling meal in one pot means fewer dishes to scrub.
Before cooking, set aside clean rinse water so you don’t accidentally use the last of your supply. Also, a small squeeze bottle helps rinse stubborn corners without filling another basin. For sticky oatmeal or rice, soak the pot with a little warm water as soon as it’s safe to handle.
If water is very limited, prioritize hygienic cleaning for eating surfaces. Don’t treat wiping a dirty plate with grass, sand, or an old cloth as a substitute for washing it properly. If you forgot soap, warm clean water and thorough scrubbing may handle light residue, but they are not a reliable substitute for cleaning greasy cookware or sanitizing utensils exposed to raw meat. When you cannot wash safely, contain the dirty dishes until you can.
Keep the Dishwashing Area Safe From Wildlife
Dirty pots, sponges, food scraps, and wash water can attract animals, even when the cookware looks mostly clean. So finish cleanup after eating rather than leaving dishes outside for the morning.
Seal the scraps and used paper towels in your trash system. Also, store food-scented supplies and cleaned cookware according to the campground’s rules, particularly in bear habitat. I plan dish cleanup together with keeping food and scented items secure at camp, because an otherwise tidy tent site can still attract wildlife if the wash area is neglected.
Final Thoughts
The best camping dishwashing routine is simple: scrape thoroughly, wash with a small amount of warm soapy water, rinse with safe water, and let your cookware dry. Just as important, collect every food scrap and dispose of wastewater the way your campsite allows. For that reason, I would rather carry one small strainer and a little extra rinse water than leave a messy wash area behind. With that routine, you can enjoy camp cooking without turning cleanup into a problem for the next camper or nearby wildlife.