How Should Hiking Shoes Fit? A Complete Sizing Guide
A well-fitting hiking shoe is the difference between a great day on the trail and a slow-motion blister disaster. I learned that the hard way on a Bandarban trek where my too-tight shoes turned both pinky toes black by sundown. Sizing a hiking shoe is not the same as sizing a sneaker, and most beginners get it wrong the first time. Below I’ll walk you through every part of how hiking shoes should fit, what to test, and how to skip the mistakes that cost me a toenail.
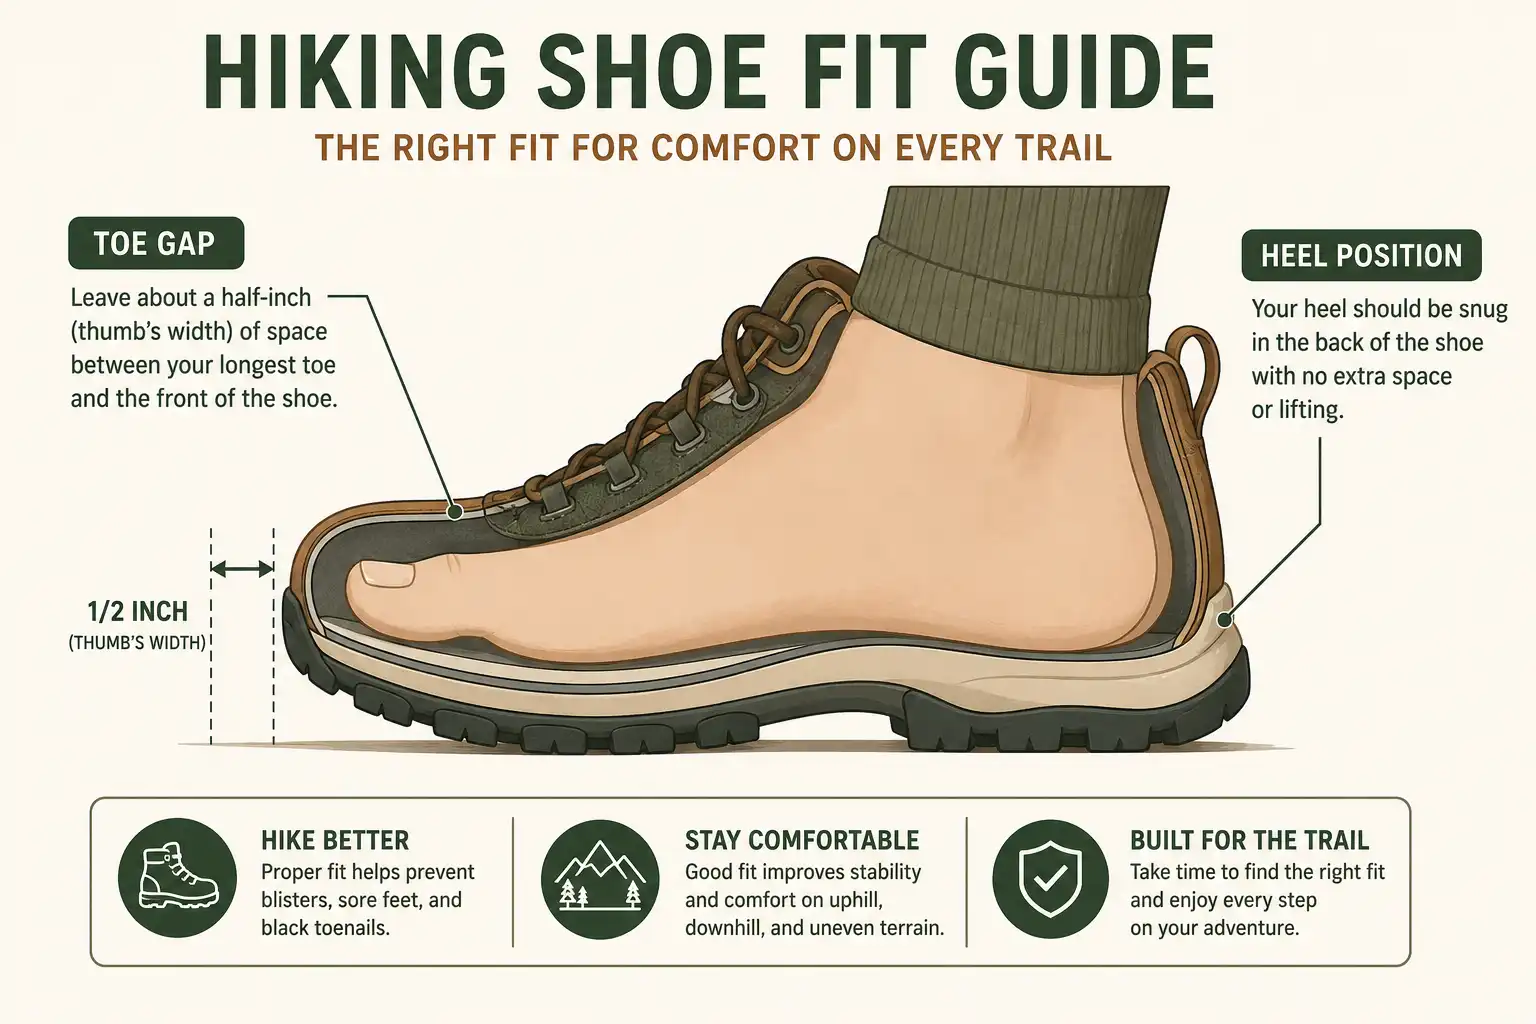
Hiking shoes should feel snug through the midfoot and heel with about a thumb’s width of space (roughly half an inch) in front of your longest toe. Your heel must not lift when you walk. Also, the toe box should be wide enough that your toes spread naturally, especially on downhills. In most cases, you’ll size up by half a size from your regular sneaker.
Learn more: Tie Hiking Boots for Long Trails
How much toe room should hiking shoes have?
You need about half an inch (a thumb’s width) of space between your longest toe and the front of the shoe. This gap protects your toenails on steep descents, when your feet slide forward inside the shoe with every step.
Here’s the simple test I use in the store. Unlace the shoe, slide your foot all the way forward until your toes touch the front, then check the heel gap. One index finger should fit snugly behind your heel. If two fingers fit easily, the shoe is too big. If your finger barely slides in, you need a half size up.
Without enough toe room, downhill hiking turns brutal. After a steep two-hour descent from Keokradong, I once watched a friend lose two toenails because his boots were a half size too small. Therefore, always test for toe space, not just overall comfort.
See more: Should Hiking Shoes Be Tight or Loose? Fit Guide
How tight should the heel and midfoot feel?
The heel cup should hold your foot firmly with zero lift when you walk. Lift means blisters, full stop. The midfoot should feel snug across the top, like a firm handshake, with no pinching on the sides.
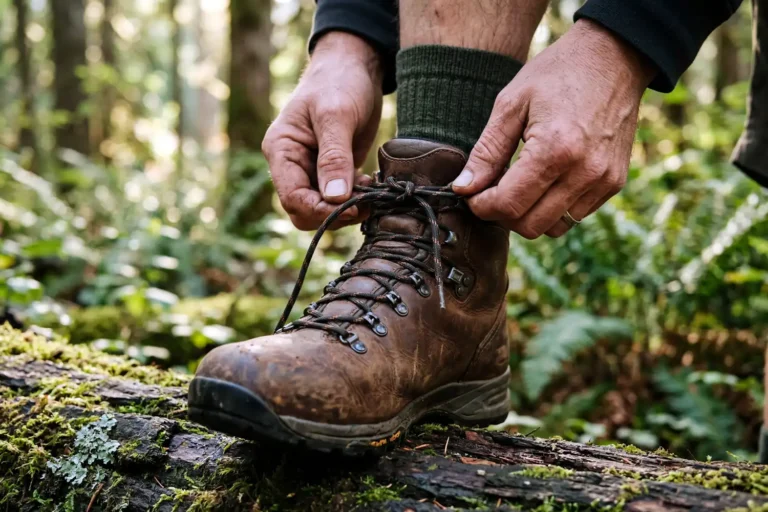
To test heel hold, lace the shoe normally and walk a few steps. If your heel pops up even a quarter inch, the shoe does not fit. Try a different lacing pattern (a runner’s loop through the top eyelet helps), or pick a different model. Heel slippage on a long hike is the single biggest cause of blisters at the back of the foot.
For the midfoot, you should feel pressure across the top of your foot, not on the sides. Side pressure means the shoe is too narrow. Top pressure means you can fine-tune with the laces.
Should hiking shoes be a size bigger?
Yes, most hikers should size up by half a size from their regular shoe. Your feet swell during long hikes, especially in heat and at altitude. So a shoe that fits perfectly at the store may feel a full size too small four hours into the trail.
Also remember that hiking socks are thicker than regular socks. Bring the exact socks you plan to hike in when trying shoes on. If you wear a US 9 in sneakers, expect to be a US 9.5 in hiking shoes. People with wider feet sometimes need to go up a full size or pick a wide-fit model instead. For more on this, my guide to picking the right shoes for broader feet covers what to look for.
When is the best time to try on hiking shoes?
Try on hiking shoes in the late afternoon or evening, never first thing in the morning. Your feet are naturally larger after a full day of walking, so afternoon sizing matches what your feet will feel like on the trail.
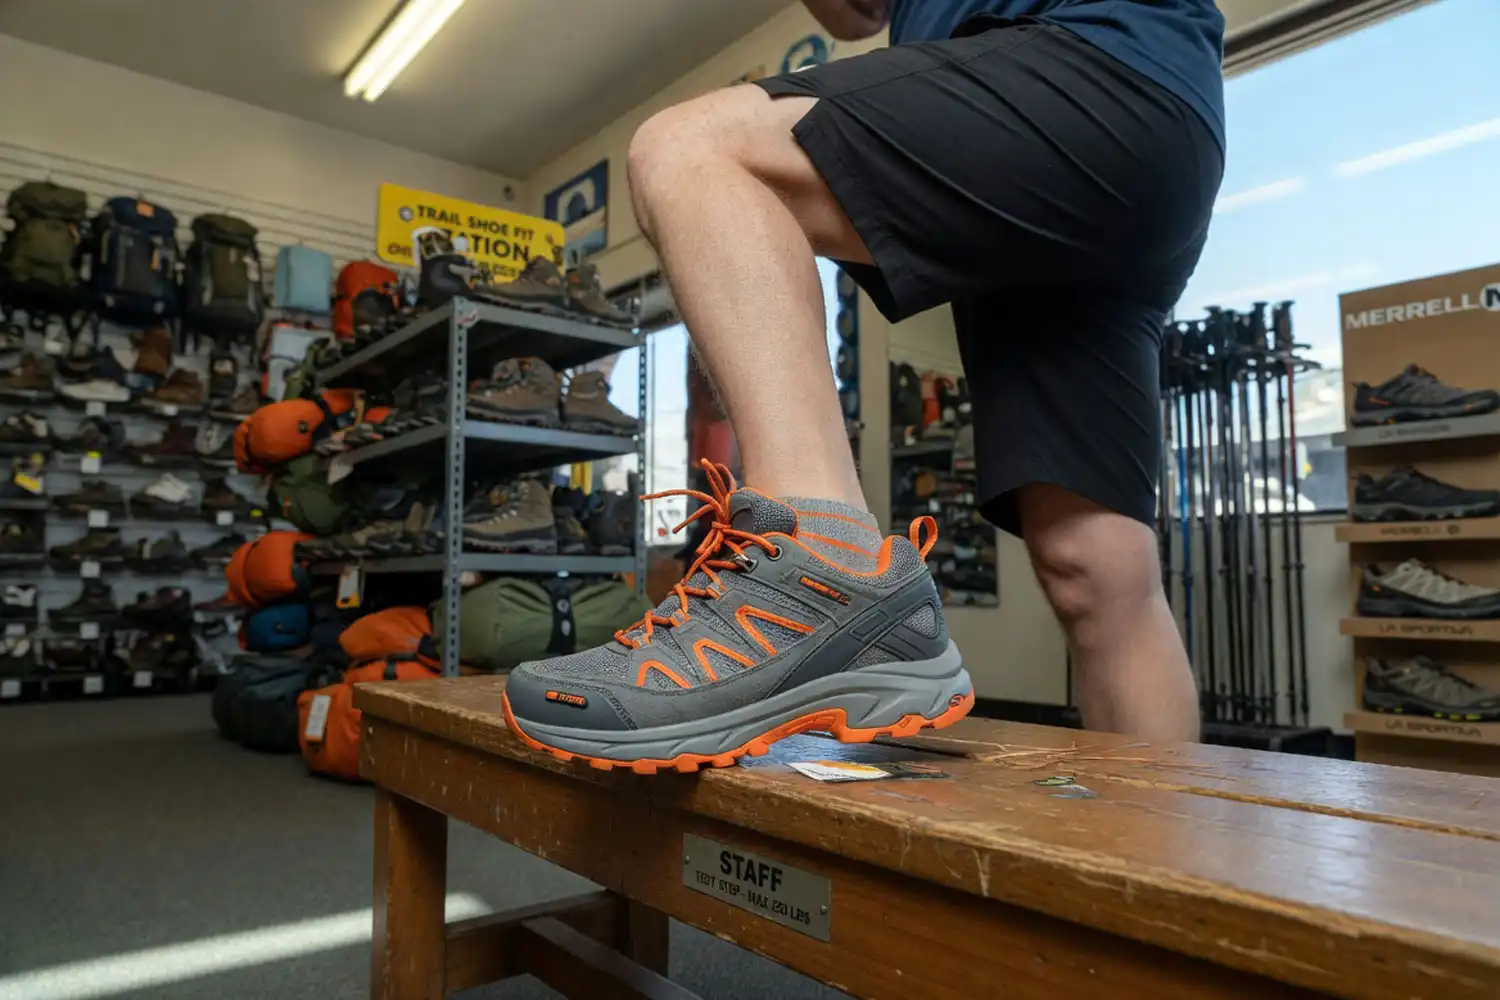
If you can, walk a few laps around the store. Better yet, find a store with a small incline ramp. Many outdoor retailers have these so you can test downhill pressure on your toes before buying.
How to test the fit in the store
Run through this quick checklist before walking out with a new pair:
- Thumb-width toe gap. Stand up and push your toes to the front. One finger fits behind the heel.
- Heel lock. Walk around. Your heel should stay glued in place.
- Downhill test. Walk down an incline or step. Toes must not slam into the front.
- Uphill test. Walk up an incline. Heel should not lift.
- Side pressure. No pinching on the outside of the foot.
- Sock match. Always test in your real hiking socks.
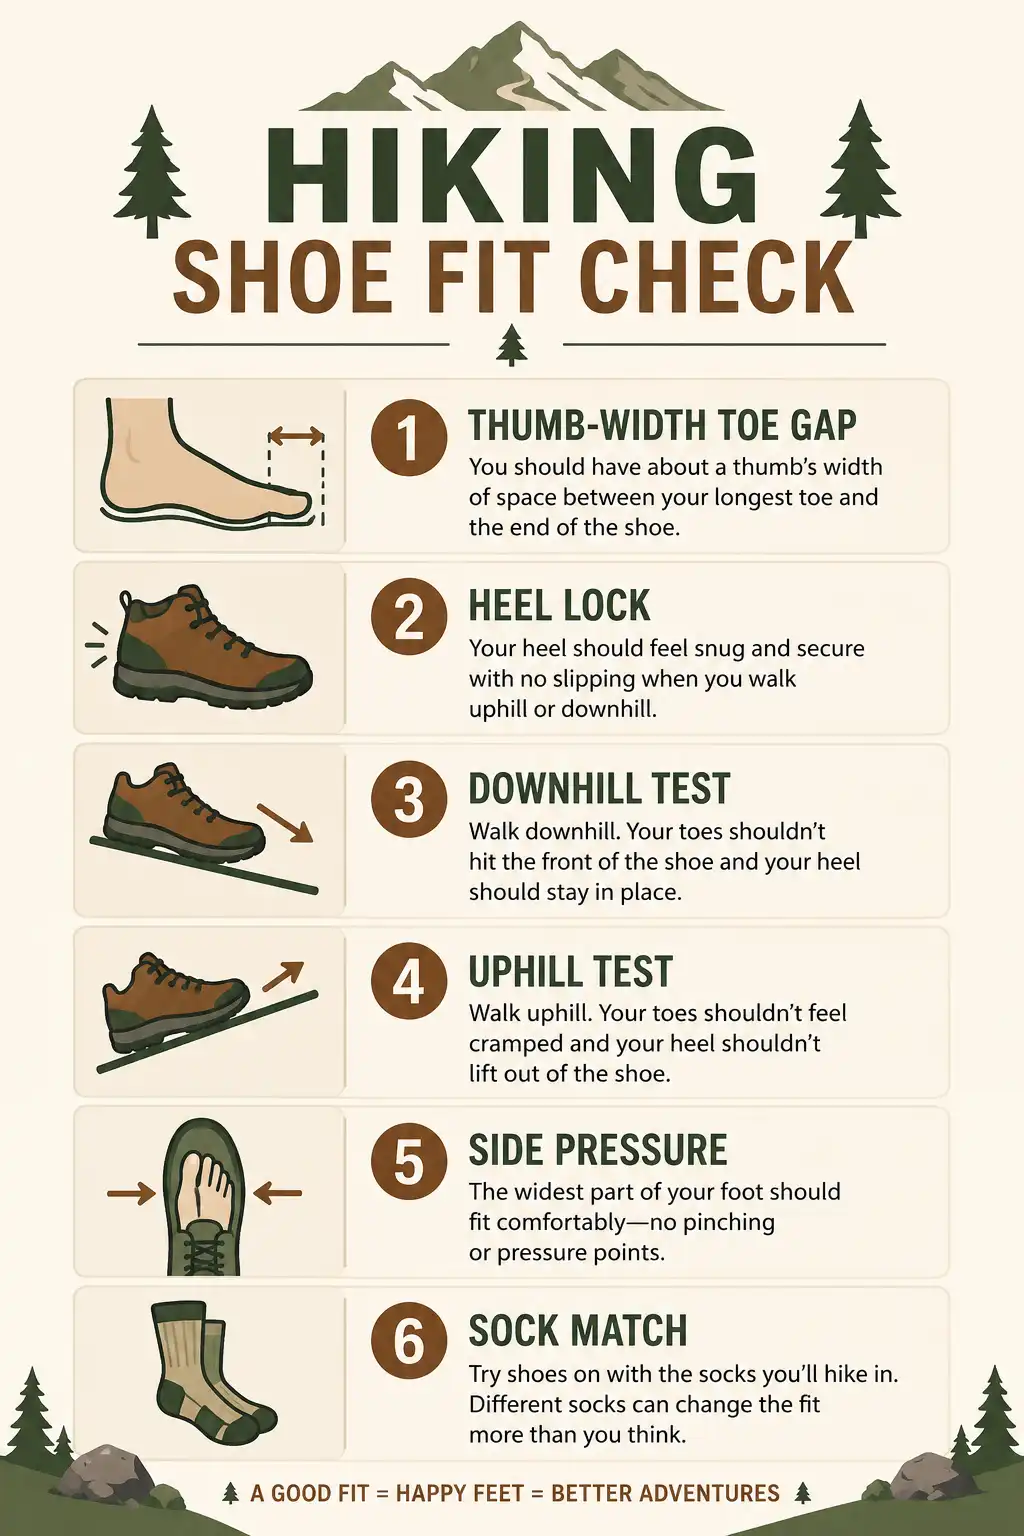
Skip any of these and you’ll find out the hard way later. I always do all six, even for brands I’ve worn for years, because the same size in a new model often fits differently.
Do socks and insoles change the fit?
Yes, both can change the fit dramatically. A thick merino hiking sock fills out a shoe that felt slightly loose. Aftermarket insoles can correct a slightly loose heel or add arch support that the stock insole lacks.
If you struggle with blisters, the right sock matters as much as the right shoe. I wrote a full breakdown of socks built for blister prevention that explains why double-layer and merino options work so well. Combine the correct sock with a properly sized shoe and most foot problems on the trail simply disappear.
How do you know your hiking shoes don’t fit?
Your hiking shoes don’t fit if you see any of these signs after a hike: black toenails, blisters at the heel or pinky toe, numbness in the forefoot, or sharp pain across the top of the foot.
Black toenails mean the toe box is too short. Heel blisters mean the heel cup is too loose. Pinky toe blisters mean the shoe is too narrow. Numbness usually means the laces are too tight, but it can also mean the shoe is too small overall. Pain across the top often points to a high instep paired with a low-volume shoe.
After my first long trek, I had two of these problems at once. So I returned the shoes, sized up, and switched brands. Two weeks later on the same trail, my feet felt fine.
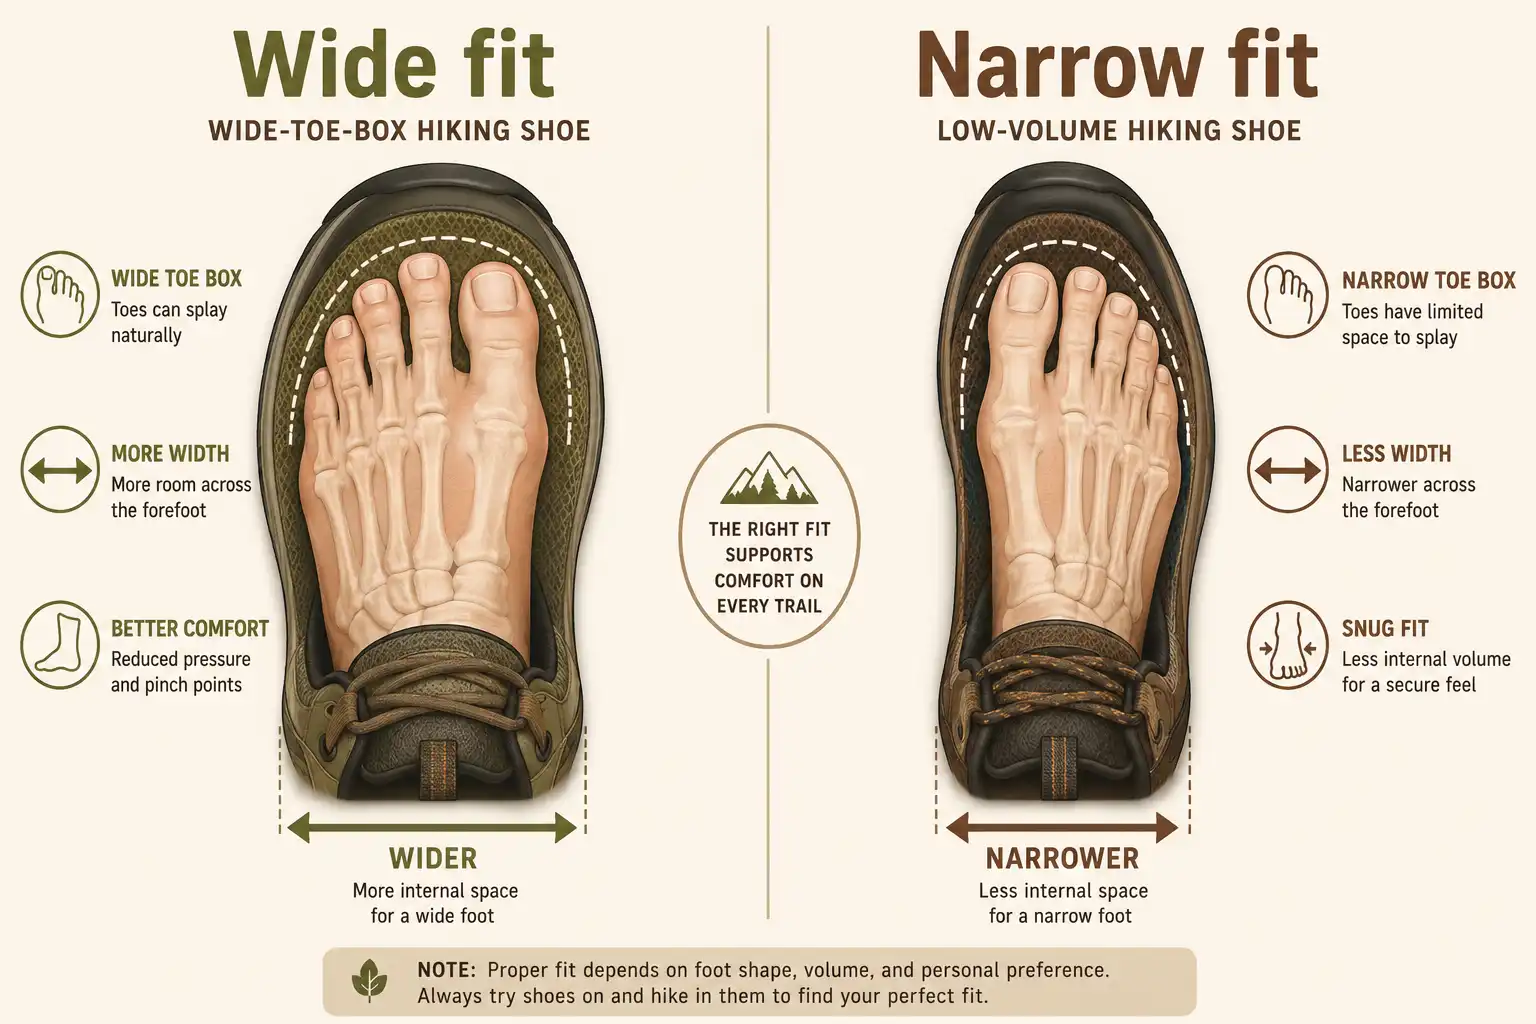
How does fit differ for wide vs narrow feet?
Wide feet need a wider toe box and often a half size up for length, while narrow feet need a snugger midfoot and a brand known for low-volume lasts. Most major brands offer both regular and wide widths. Some, like Altra and Topo, are built around naturally wide toe boxes. Others, like Salomon and La Sportiva, tend to run narrow.
If your toes feel squeezed together in a regular-width shoe, you have wide feet and should pick accordingly. When your foot slides side to side in most shoes, you have narrow feet. Either way, the wrong width creates blisters fast.
Should you break in hiking shoes before a trip?
Yes, always break in new hiking shoes before a long trip. Even the best-fitting pair needs a few short walks to mold to your feet and reveal any hidden pressure points. Plan at least 15 to 25 miles of mixed walking before your first real hike. My step-by-step guide to breaking in fresh trail boots covers exactly how to do it without wrecking your feet.
If you skip the break-in and the shoes turn out to be wrong, you’ll find out 10 miles into a hike with no way back. Therefore, never wear brand-new hiking shoes on a long trail. Also, if you’re still torn between low-cut and ankle-high options, this comparison of trail footwear for new hikers will help you pick.
Final fit check before the trail
Before any serious hike, do one final fit test at home. Put on the socks you’ll wear, lace the shoes the same way you will on the trail, and walk down a flight of stairs. If your toes touch the front even once, the shoes are too small. Then walk back up. When your heel lifts, the shoes are too loose.
This 60-second check has saved me from at least three bad trips. It also catches problems that only show up after the break-in period, like an insole that has compressed or laces that have stretched.
Final thoughts
Getting hiking shoe fit right is mostly about ignoring the size on the box and trusting what your feet tell you. Aim for a thumb’s width of toe room, a locked-in heel, and a snug midfoot with no side pinching. Size up half a size, test in your hiking socks, and always check the fit late in the day. Get those four things right and you’ll skip the blisters, black toenails, and trip-ending foot pain that plague new hikers. Your feet carry you the whole way. Treat them well.