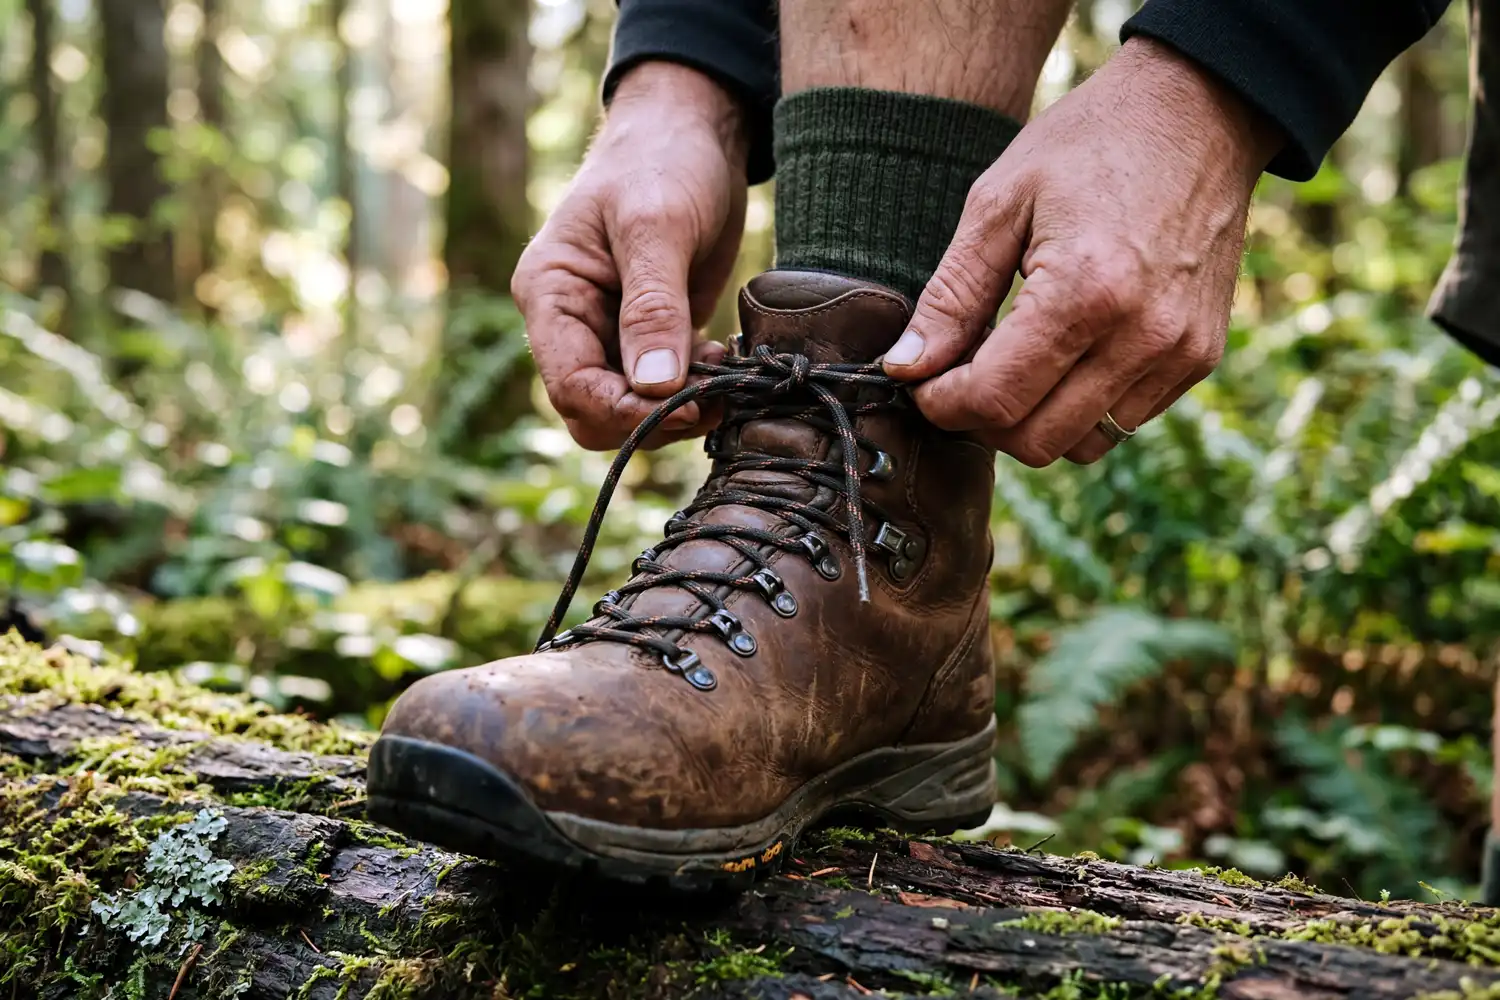
How to Tie Hiking Boots for Long Trails and Steep Climbs
Most foot pain on the trail comes from how the boots are laced, not from the boots themselves. I learned this the hard way on a long descent from Keokradong, when my toes slammed the front of my boots until two nails turned black. After that trip, I started taking lacing seriously. This guide walks you through every lacing method I now use, why each one works, and how to match the technique to your foot shape and the trail ahead.
Tie hiking boots snug across the forefoot, firm across the instep, and locked at the ankle. Start by pulling the laces tight at the toes, then work upward in sections, using a heel lock at the top eyelet to stop your foot from sliding forward. Adjust the pressure differently for uphill and downhill so your toes stay free and your heel stays planted.
Also know: Lace Hiking Boots to Stop Blisters and Sore Toes
Why Proper Boot Lacing Matters
How you lace your boots controls three things: blood flow, blister risk, and joint stability. A boot that is too loose lets the heel lift and the foot slide. Boots that are too tight cut circulation and bruise the top of the foot. Both lead to pain within a few hours. Good lacing keeps the foot locked in the right zones without choking the rest.
I have seen new hikers tighten the laces evenly from bottom to top, then wonder why their toes ache by mile five. Even tension across the foot is not the goal. Zoned tension is. That is the whole idea behind the methods below.
Before You Lace: Quick Boot Prep
Before you start lacing, check a few things first.
- Wear the socks you plan to hike in. Sock thickness changes the fit.
- Inspect the laces for fraying or weak spots. Replace anything close to snapping.
- Kick your heel back into the boot before pulling the laces. This seats your heel in the heel cup where it belongs.
- Loosen the entire lacing first. Then tighten in sections from the toes up.
If you have not broken in your boots yet, lace them carefully every time. Stiff boots cause hotspots fast. For a deeper walkthrough on softening up new leather, see my guide on getting new boots ready for the trail.
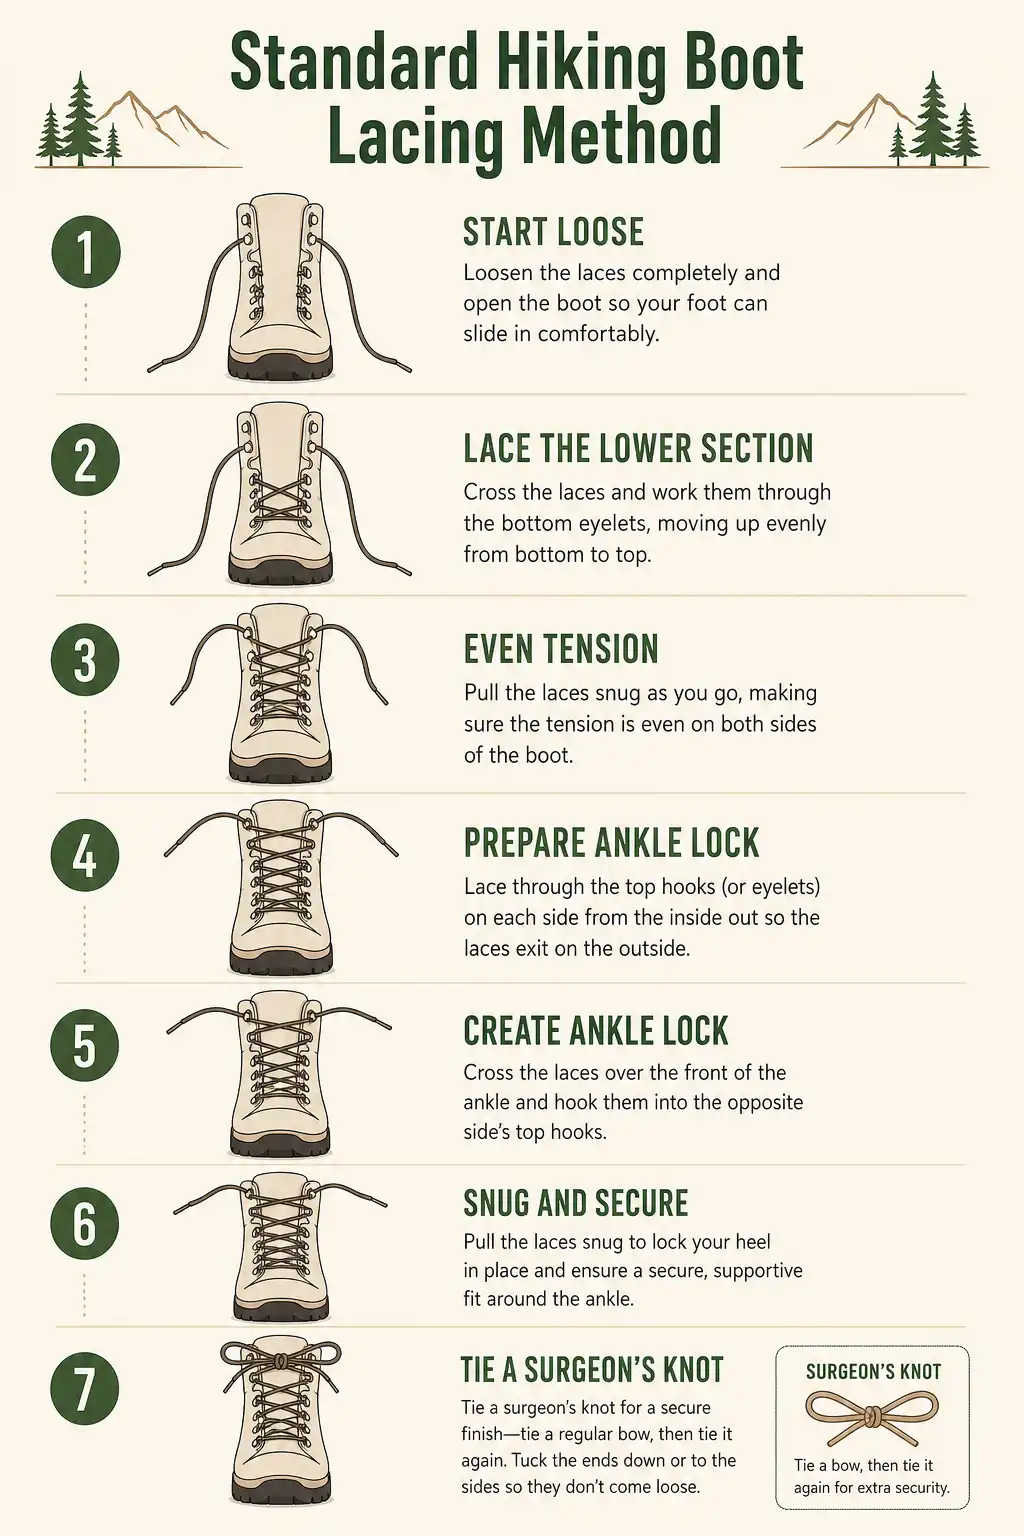
The Standard Hiking Boot Lacing Method
The standard method is a sectioned criss-cross. Here is how I do it on every hike.
- Loosen all laces fully.
- Slip the boot on and kick the heel back.
- Pull each criss-cross tight from the toe eyelets up to the ankle bend.
- Pause at the ankle bend. Pinch the laces against the boot so they hold.
- Tie a surgeon’s knot (heel lock) at that spot.
- Continue lacing up to the top eyelet with firmer tension.
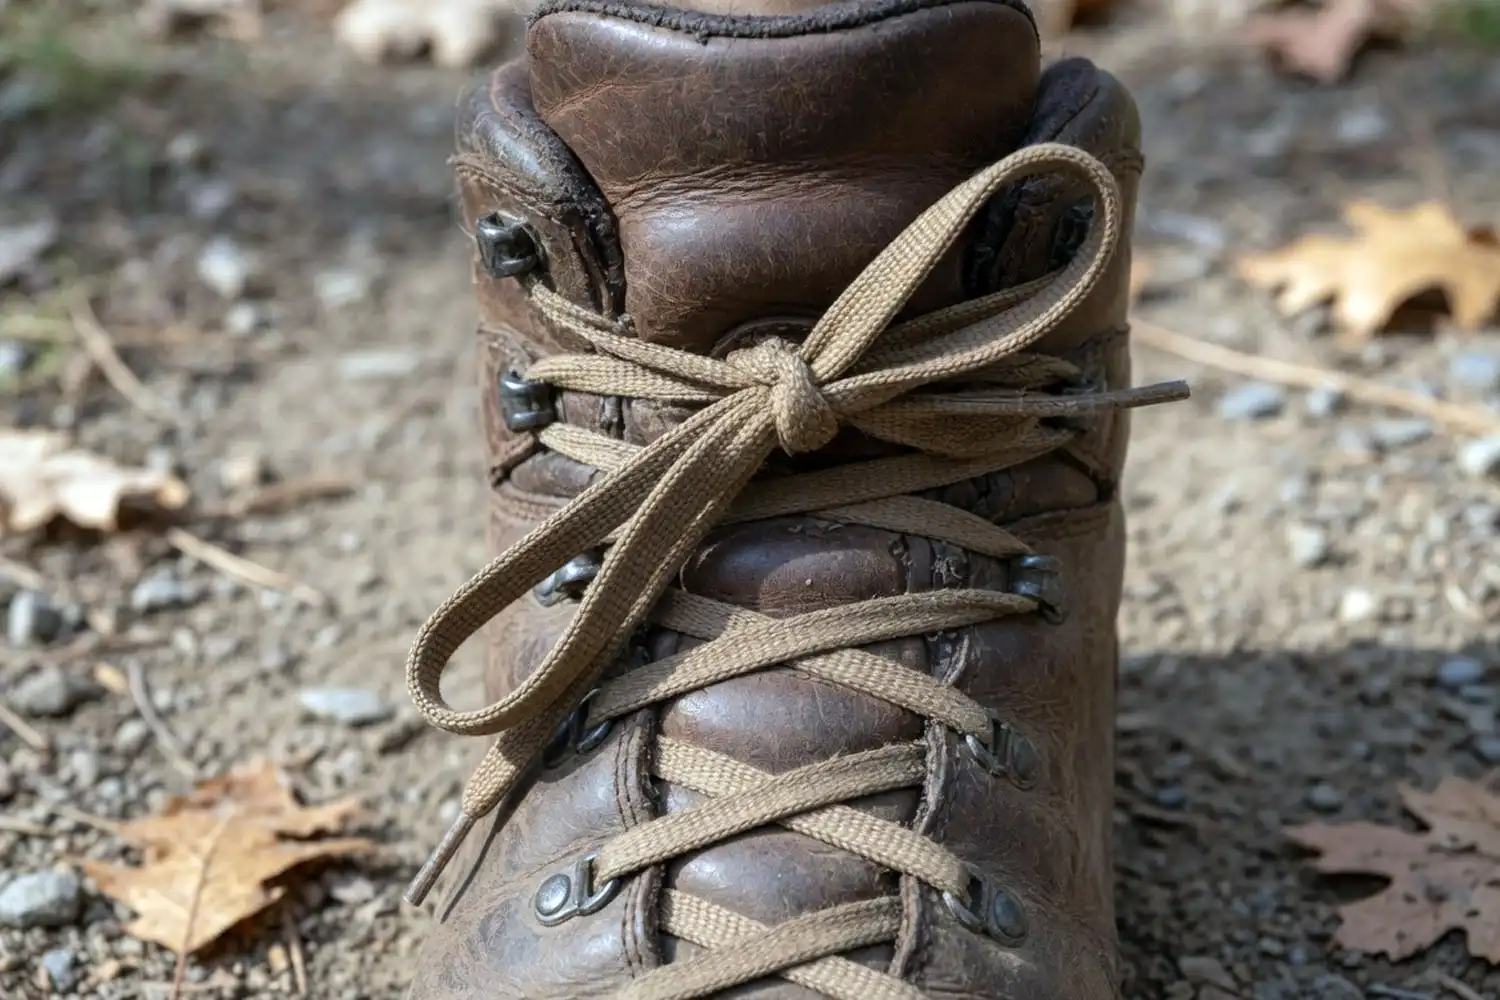
- Finish with a double knot.
This locks the foot at the ankle while leaving the forefoot relaxed enough for swelling on long hikes. After a few miles, your feet expand. Without that ankle lock, the foot starts to drift forward, and toes hit the front.
Lacing Techniques for Common Foot Problems
Different foot shapes need different lacing patterns. Pick the one that matches your problem.
Heel Lock for Slipping Heels
The heel lock fixes the most common hiking boot issue, a heel that lifts with every step. To tie it, lace up normally to the ankle bend. Then loop each lace through the next eyelet on the same side instead of crossing it. After that loop, run the laces across as usual and tie them off. The friction from those two side loops grips the lace and stops slippage cold.
I use the heel lock on almost every hike. Without it, even good boots will rub the back of your heel raw. That is a fast track to blisters, which is why I also keep a strict sock system in place. If blisters are a recurring issue for you, my notes on stopping blisters before they start cover the rest of the routine.
Window Lacing for Top-of-Foot Pressure
Window lacing relieves pressure spots on the top of the foot. If you feel a sore patch on your instep, find the eyelets above and below that spot. Skip the cross at that level. Then run each lace straight up to the next eyelet, and resume crossing above. The gap creates a window with no pressure on the sore zone.
This trick saved my left foot on a wet climb up to Nilgiri. I had a tight tendon, and the standard criss-cross was crushing it. One window cut the pain in half.
Toe Relief Lacing for Downhill
For long descents, loosen the lower laces and tighten the upper ones. Steep downhill sections push the toes forward into the boot. If the forefoot has any slack, the toes hit the front and bruise. Loose at the toes, tight at the ankle. Always check this before a steep drop.
Sore knees often pair with bad descent lacing because hikers tense up to protect their toes. If your knees give you trouble going down, my tips on easing downhill knee pain pair well with this lacing fix.
Wide Forefoot Lacing
If your forefoot is wide or your toes feel crammed, skip the first criss-cross. Run the laces straight from the bottom eyelets to the second pair, then start crossing. This opens the toe box without sacrificing ankle hold. Hikers with wider feet also benefit from picking the right boot in the first place, so a boot built for a broader foot shape will always lace easier.
How Tight Should Hiking Boots Be?
Snug enough to lock the heel, loose enough to wiggle your toes. The forefoot should feel held, not squeezed. The ankle should feel firm but not pinched. After tying, stand up and walk a few steps. If your toes touch the front when walking on flat ground, the lacing is too loose at the ankle. If your foot feels numb after five minutes, the lacing is too tight at the instep.
I always retie once after the first ten minutes. Feet warm up, swell slightly, and settle into the boot. The first knot is almost never the final knot.
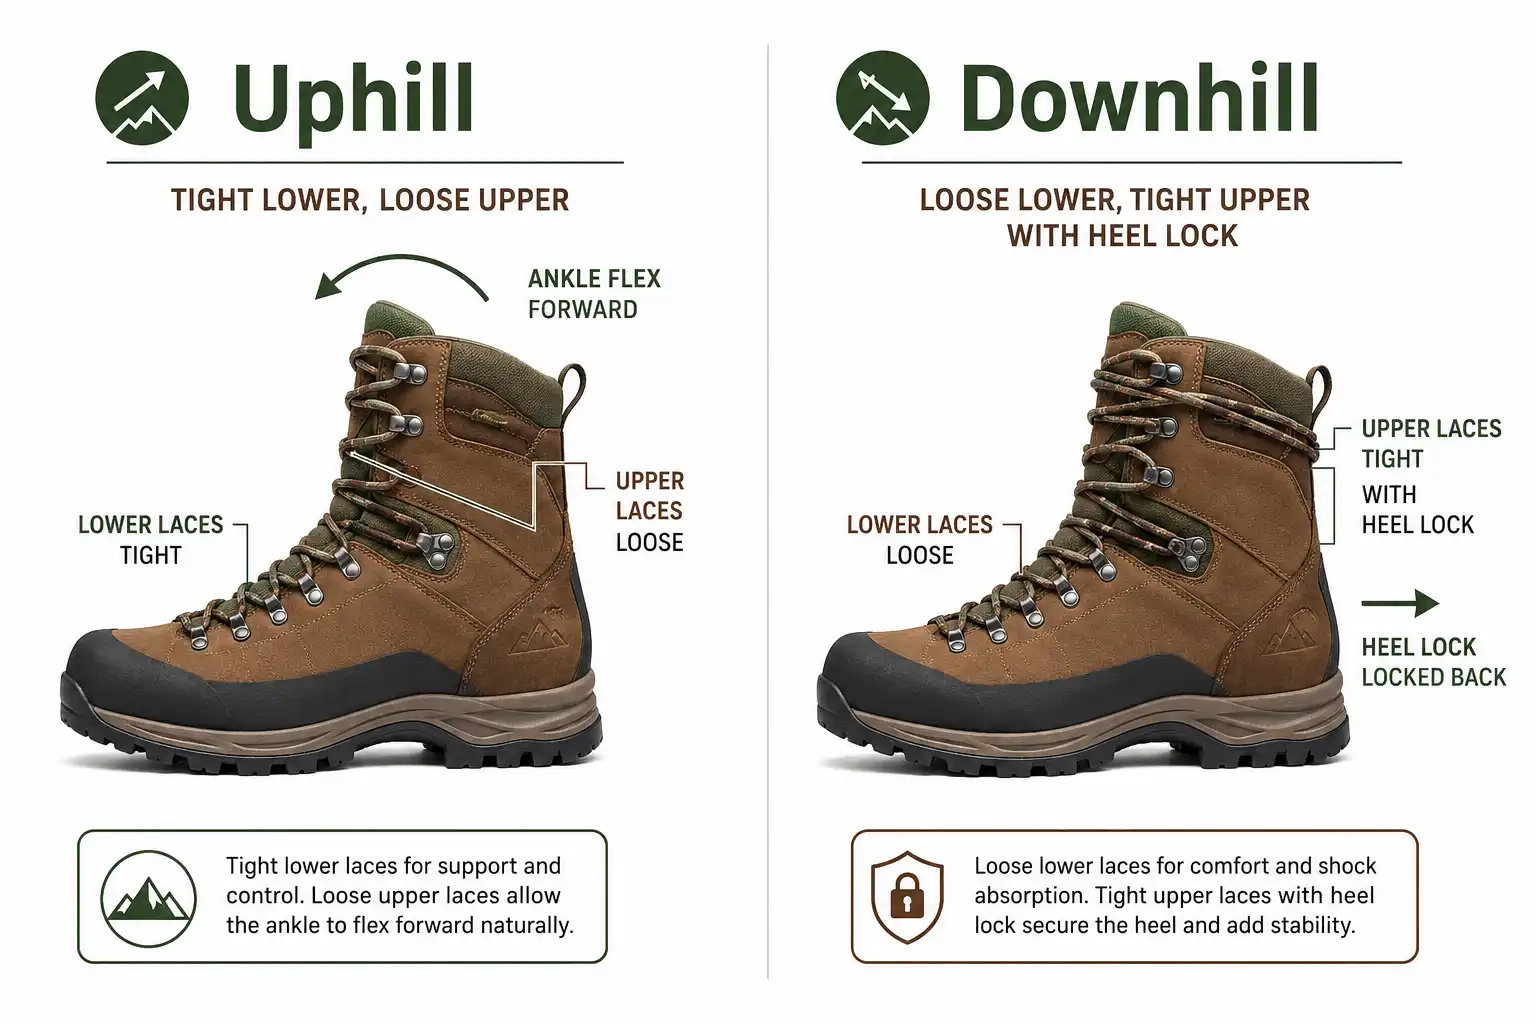
Lacing for Uphill vs Downhill
Uphill and downhill need opposite lacing pressure.
- Uphill: loose ankle, snug forefoot. This lets the ankle flex forward without lace bite on the shin.
- Downhill: tight ankle, looser forefoot. This locks the heel back and saves the toes.
On a mixed route, I retie at the top of every major climb. Thirty seconds of lacing saves an hour of pain later.
Common Lacing Mistakes to Avoid
- Tying all laces at one even tension from toe to top.
- Skipping the heel lock on rough terrain.
- Leaving long lace tails that catch on roots.
- Ignoring a hotspot instead of stopping to retie.
- Using a worn or thin lace on a multi-day trip.
Also, do not tie a simple bow at the top. Use a double knot or a surgeon’s knot. A single bow can loosen in two miles, and you will not notice until your heel is already sliding.
FAQs on Tie Hiking Boots
Should I retie my hiking boots during a hike?
Do hiking boots stretch over time?
Why do my toes hit the front of the boot going downhill?
Are hiking boots better than hiking shoes for trails?
Final Words
Lacing is the cheapest upgrade you can make to your hiking comfort. No new gear, no extra weight, just a few minutes of attention before and during the hike. Start with the standard method. Add the heel lock right away. Pull in the window lacing or toe relief lacing as your feet tell you what they need. After a few hikes, you will not even think about it. Your feet will just feel right, mile after mile.