What Is a Switchback in Hiking? Meaning, Purpose, and Tips
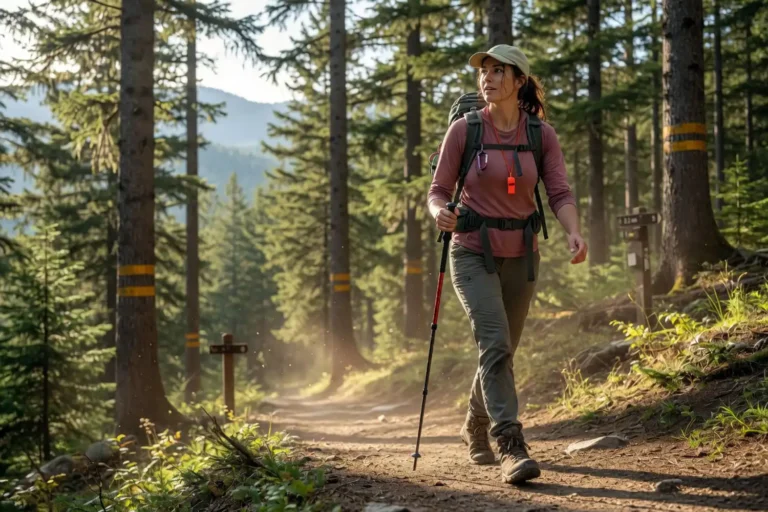
A switchback is one of those trail features you notice the moment a mountain gets serious. On my first real climb in the Bandarban hills, the path stopped going straight and started zigzagging across the slope. That zigzag is a switchback. This guide covers what switchbacks are, why trail builders use them, how to hike them without burning out, and why you should never cut across one.
What Is a Switchback in Hiking?
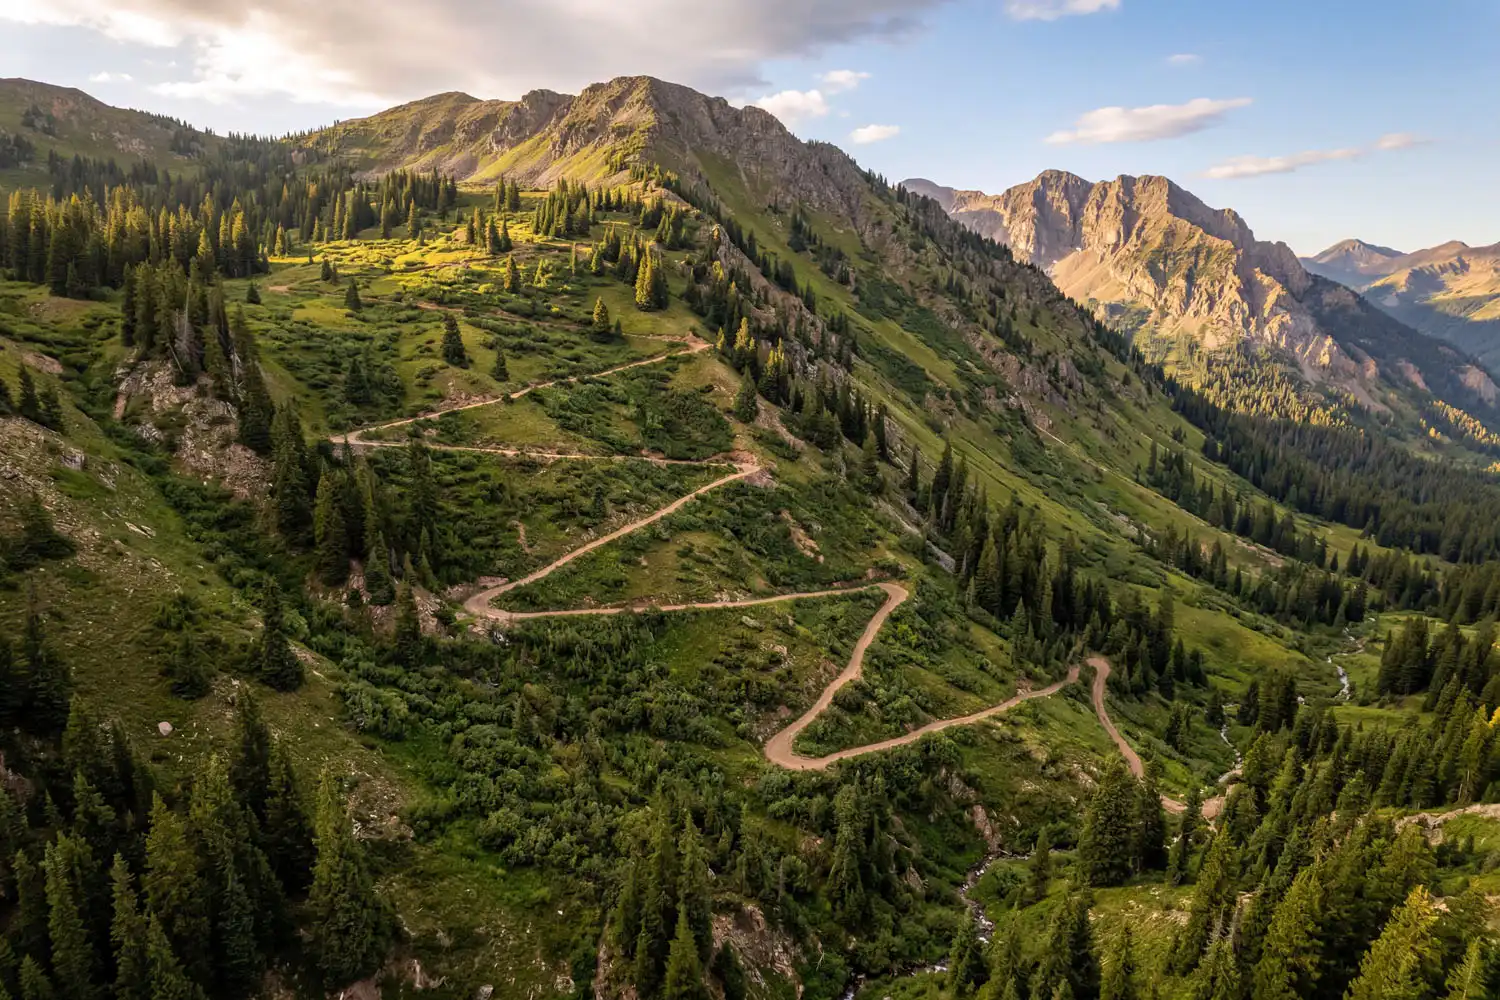
A switchback is a sharp turn in a hiking trail that reverses direction across a steep slope, creating a zigzag pattern instead of a straight line up or down the mountain. Trail designers use switchbacks to reduce the grade, so hikers climb at a manageable angle instead of fighting a near-vertical wall.
Each leg of the switchback is called a traverse. The point where the trail bends back on itself is the turn, or apex. Together, the legs and turns let you gain elevation gradually while moving sideways across the hillside.
Know more: Scramble in Hiking
Why Trails Use Switchbacks
Switchbacks exist for two practical reasons: hiker safety and trail durability. A straight path up a steep mountain might cover less distance, but it punishes your legs, your lungs, and the trail itself.
Easier Grade
A straight trail up a 40% slope is brutal. However, switchbacks cut that grade down to roughly 8 to 12%, which most hikers can sustain for hours. Lower grade means slower elevation gain per step, so your heart rate stays in check.
Erosion Control
Water runs straight down a slope. If a trail goes straight up, every storm turns it into a gully. Switchbacks break up that water flow because the path crosses the hill sideways. In addition, trail crews build drainage features at each turn to push water off the tread before it can carve a channel.
Long-Term Trail Health
A well-built switchback system can last decades with minimal repair. Meanwhile, trails that go straight up the fall line wash out within a few seasons and force land managers to reroute, close, or rebuild them.
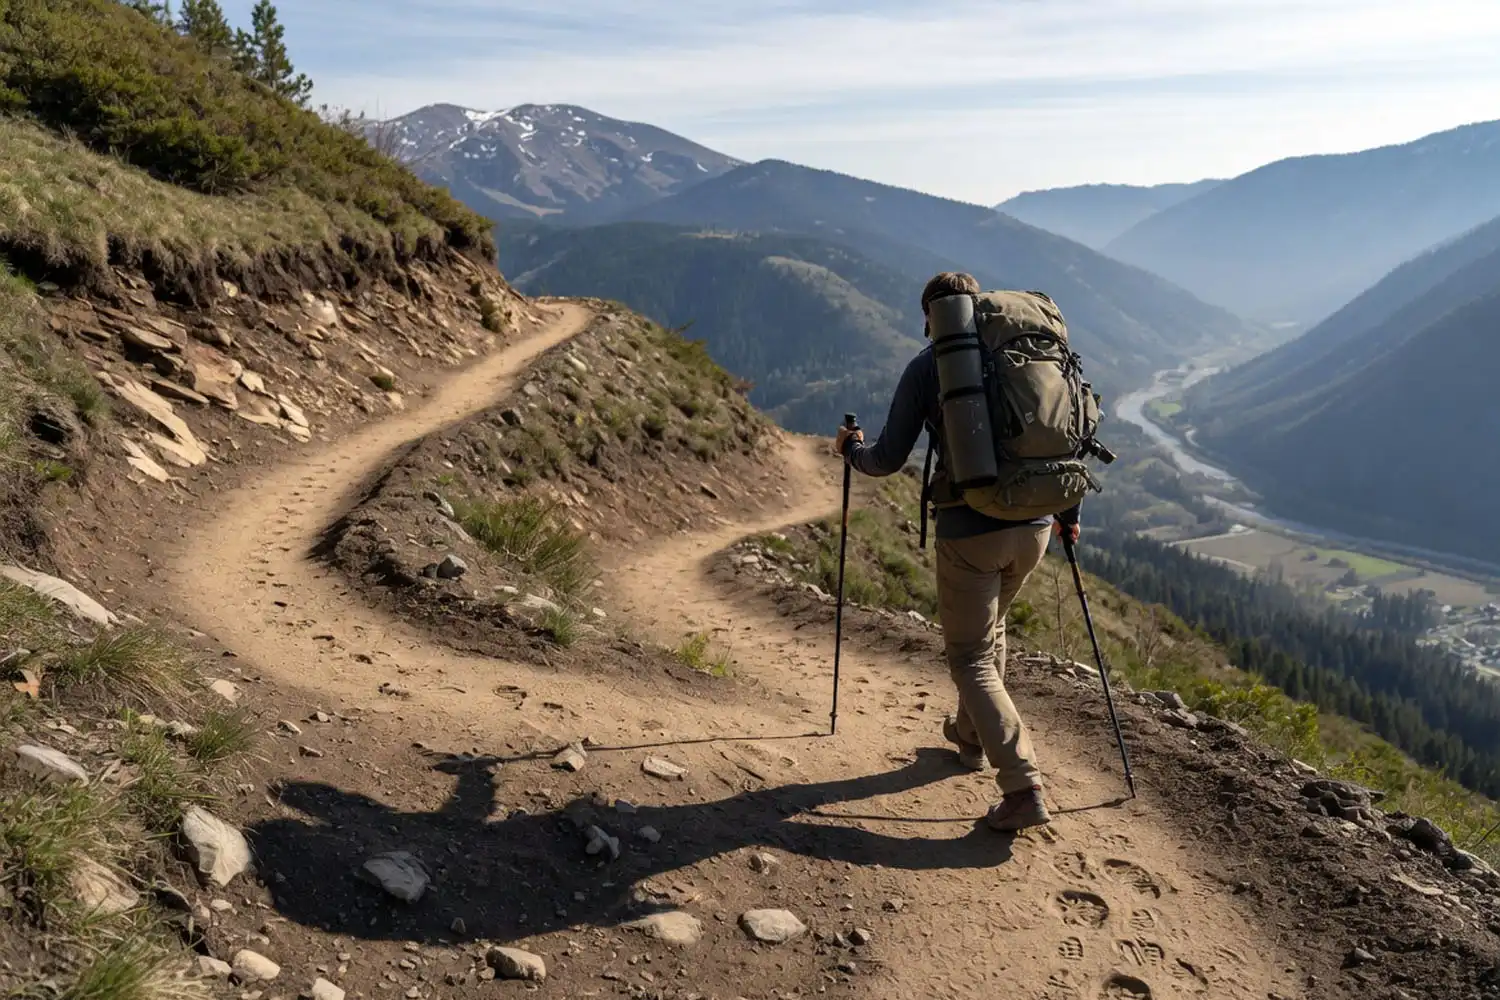
How Switchbacks Work in Practice
On a typical switchback, you walk maybe 100 to 300 feet along one leg, then hit a sharp turn and reverse direction. The next leg climbs in the opposite direction at the same gentle grade. You repeat this pattern until you reach the top of the steep section.
The total distance hiked is longer than a straight-line climb, but the effort per step is far lower. For example, on my Keokradong trip, the final approach climbed roughly 600 feet of elevation over a winding mile of switchbacks. Without them, that same elevation gain would have required scrambling.
How to Hike Up Switchbacks Efficiently
Climbing switchbacks well comes down to pacing, breathing, and foot placement.
Slow Down and Find a Rhythm
Most hikers blow up on switchbacks because they attack the climb. Instead, shorten your stride and slow your pace until your breathing settles into a steady rhythm. If you can talk in short sentences, you are at the right pace. If you can only gasp, slow down more.
Use the Rest Step
The rest step is a mountaineering technique that works beautifully on switchbacks. Step forward with one foot, then briefly lock the back leg straight so your skeleton, not your muscles, holds your weight. That micro-rest, repeated thousands of times, saves serious energy. I learned this trick from a guide on a Bandarban ridge climb, and it changed how I hike steep ground.
Take the Turns Wide
At each apex, swing slightly wide rather than pivoting tightly. A tight pivot stresses your knees and ankles. Therefore, a wider arc keeps your momentum smooth and your joints happy.
If you want more on this, check my notes on climbing hills without burning out.
How to Hike Down Switchbacks Safely
Downhill switchbacks are sneaky. They feel easier, so people speed up, and that is when knees and ankles get hurt.
Control Your Speed
Gravity does the work, but braking with your quads burns them out fast. Instead, take shorter steps, keep your knees slightly bent, and let your hips absorb impact. Trekking poles help a lot here.
Watch Your Footing on Turns
The apex of each switchback often has loose gravel, eroded edges, or polished rock from years of foot traffic. Slow down at every turn. Then plant your downhill foot first, and bring the other through.
Protect Your Knees
Descending switchbacks for hours can wreck untrained knees. Pole work, a measured pace, and good footwear all help. I’ve covered specific techniques for reducing knee stress on long descents in another guide.
Switchback Etiquette: Never Cut the Corner
This rule matters more than most hikers realize. Cutting a switchback means walking straight up the slope between two legs of the trail instead of following the zigzag.
It looks like a shortcut. In reality, it is trail vandalism.
Why Cutting Switchbacks Is Harmful
When hikers cut corners, they create a new path straight down the fall line. Water immediately follows that path. Within a season, the shortcut becomes a rut. After a few years, it becomes a gully that destabilizes the whole hillside.
Cut-throughs also kill vegetation that holds soil in place. Once roots die, the slope sheds dirt every time it rains. Meanwhile, trail crews spend countless volunteer hours rebuilding sections that hikers destroyed in minutes.
What to Do Instead
Stay on the tread. Always. Even if you see footprints heading up the shortcut, do not follow them. If a trail is muddy or eroded, walk through the muddy section, not around it. Walking around widens the damage.
This is part of the Leave No Trace ethic, and it stays front and center whenever I plan a trip. My piece on planning low-impact trail trips goes deeper into this.
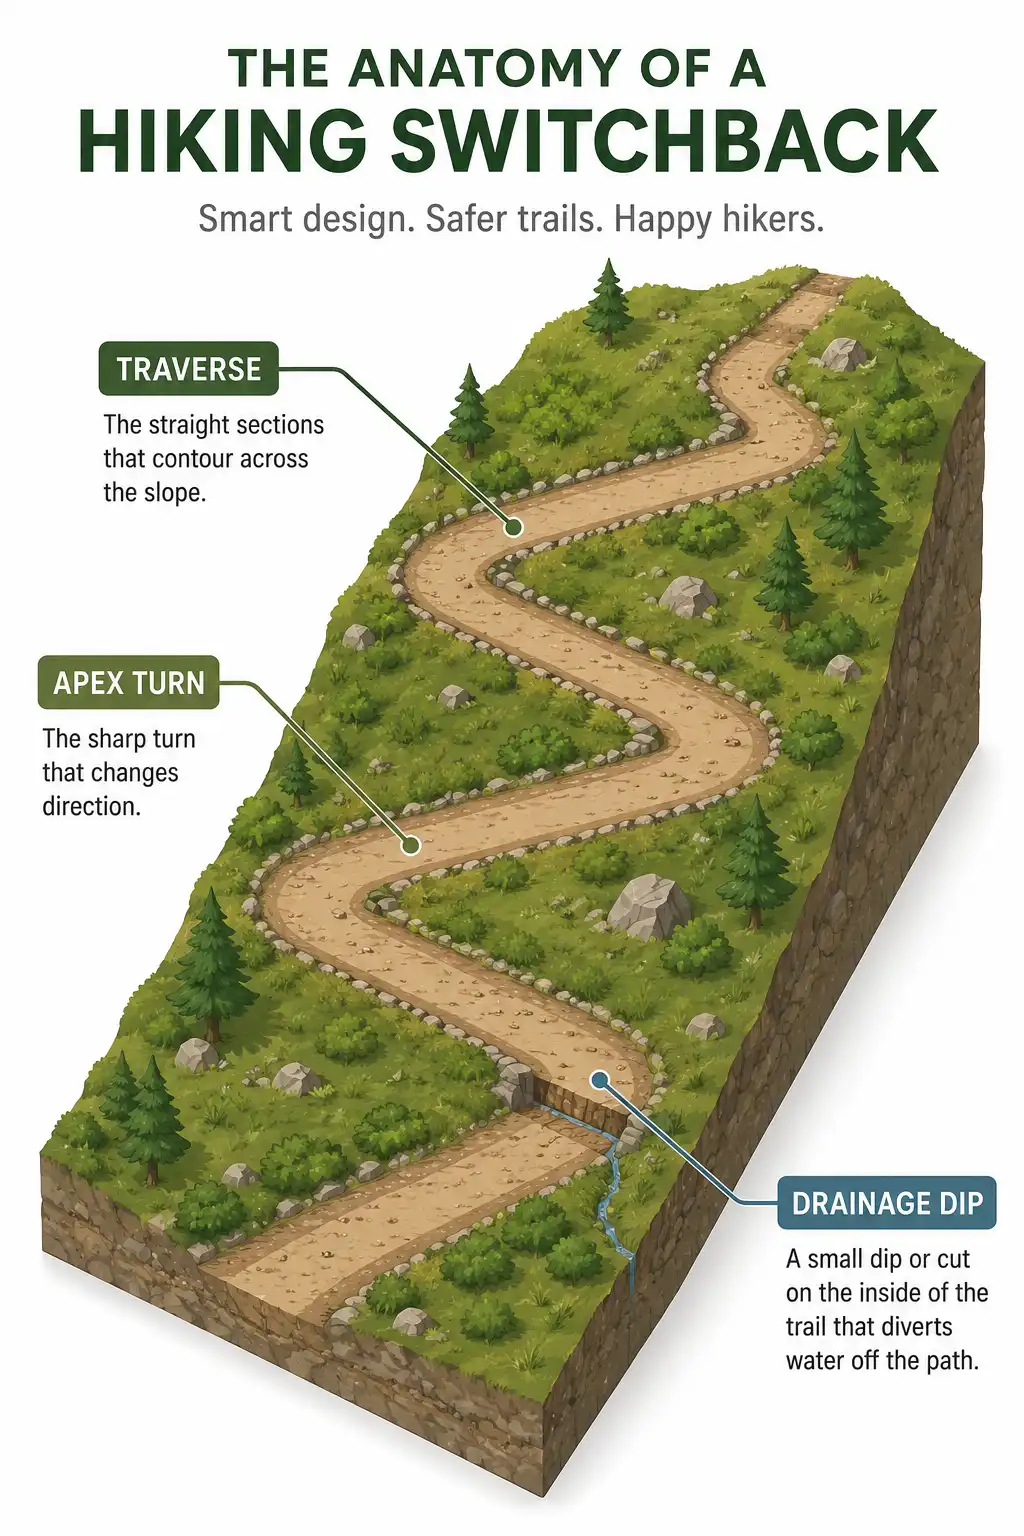
How to Spot a Well-Built Switchback
Good switchback design has a few telltale features.
- Outsloped tread: the trail tilts slightly downhill to shed water.
- Reinforced turns: rock walls, log cribbing, or compacted earth at each apex.
- Drainage dips: small cuts every 20 to 40 feet that direct water off the trail.
- Wide turning platforms: flat areas at each apex so hikers can turn without slipping.
When you see all of these together, you are walking on a trail built by people who knew what they were doing.

Common Mistakes Hikers Make on Switchbacks
A few patterns show up over and over on busy mountain trails.
Going too fast on the uphill. People sprint the first few legs and then stall halfway up. Steady wins every time.
Stopping in the middle of a turn. Apex turns are narrow. Stopping there blocks other hikers and chews up the soft soil at the bend. Instead, move to a flat traverse before resting.
Skipping water on the way up. Switchback climbs feel slow, so hikers forget to drink. Then they cramp at the top. Sip every 15 minutes regardless of how thirsty you feel.
Wearing the wrong footwear. Loose gravel at apex turns will slide flat-soled shoes right off the trail. Real hiking footwear with lugged outsoles grips far better. If you are picking between styles, my comparison of trail shoes versus boots for newer hikers covers the tradeoffs.
How Steep Is a Typical Switchback?
Most well-built switchback trails sit between 8% and 12% grade, which is the comfort zone for sustained hiking. Anything steeper than 15% tires people out fast. On the other hand, anything gentler than 5% wastes distance.
For context, a 10% grade means you gain 10 feet of elevation for every 100 feet of horizontal distance. That is roughly the angle of a moderately steep wheelchair ramp. Easy to walk, hard to maintain for hours without pacing.
If you want to understand how this connects to total climb planning, my notes on how much vertical gain counts as a hard day put real numbers on it.
A Note from My Own Trail Days
On the Nafakhum trail in Bandarban, several sections climb through dense forest using rough switchbacks cut by villagers. They are not as polished as engineered trails in the US National Parks, but the principle is the same. The zigzag pattern keeps the climb walkable instead of impossible. After hiking those slopes in monsoon mud, I have deep respect for any trail crew that builds and maintains switchbacks anywhere in the world.
Conclusion
Switchbacks are the quiet workhorse of mountain trails. They turn brutal climbs into walkable grades, protect hillsides from erosion, and keep trails usable for generations. Hike them slowly, take the turns wide, never cut the corners, and your legs and the trail will both thank you. Once you understand how they work, every steep trail becomes a little easier to read.